
Step-by-Step Instructions: Mastering Font Management for Apple Computers
Step-by-Step Instructions: Mastering Font Management for Apple Computers
Quick Links
- What Fonts Does macOS Support?
- How to View Your Fonts in Font Book
- How to Install a Font
- How to Deactivate or Remove a Font
- How to Organize Your Fonts Into Collections
Selecting the appropriate typeface can have a substantial effect on the overall visual appeal and readability of your documents. Fortunately, Mac offers a treasure trove of fonts! And let’s be honest, using the same font for a happy birthday card and a job application? Not the best idea.
We’ll guide you through Font Book on Mac, your go-to tool for managing and organizing your font collection. You’ll learn how to install, tweak, and deactivate fonts.
What Fonts Does macOS Support?
macOS Sonoma can handle many font types, like OpenType, Mac TrueType, Windows TrueType, bitmap, and dfont. As of macOS Catalina, Mac doesn’t support PostScript fonts.
How to View Your Fonts in Font Book
The Font Book app is your go-to tool for checking out the fonts you have, adding new ones, organizing them into collections, and turning them on or off. Open it through your Applications folder, or select the Launchpad icon in your Dock and find the Font Book icon there.

Font Book can show your fonts in different views:
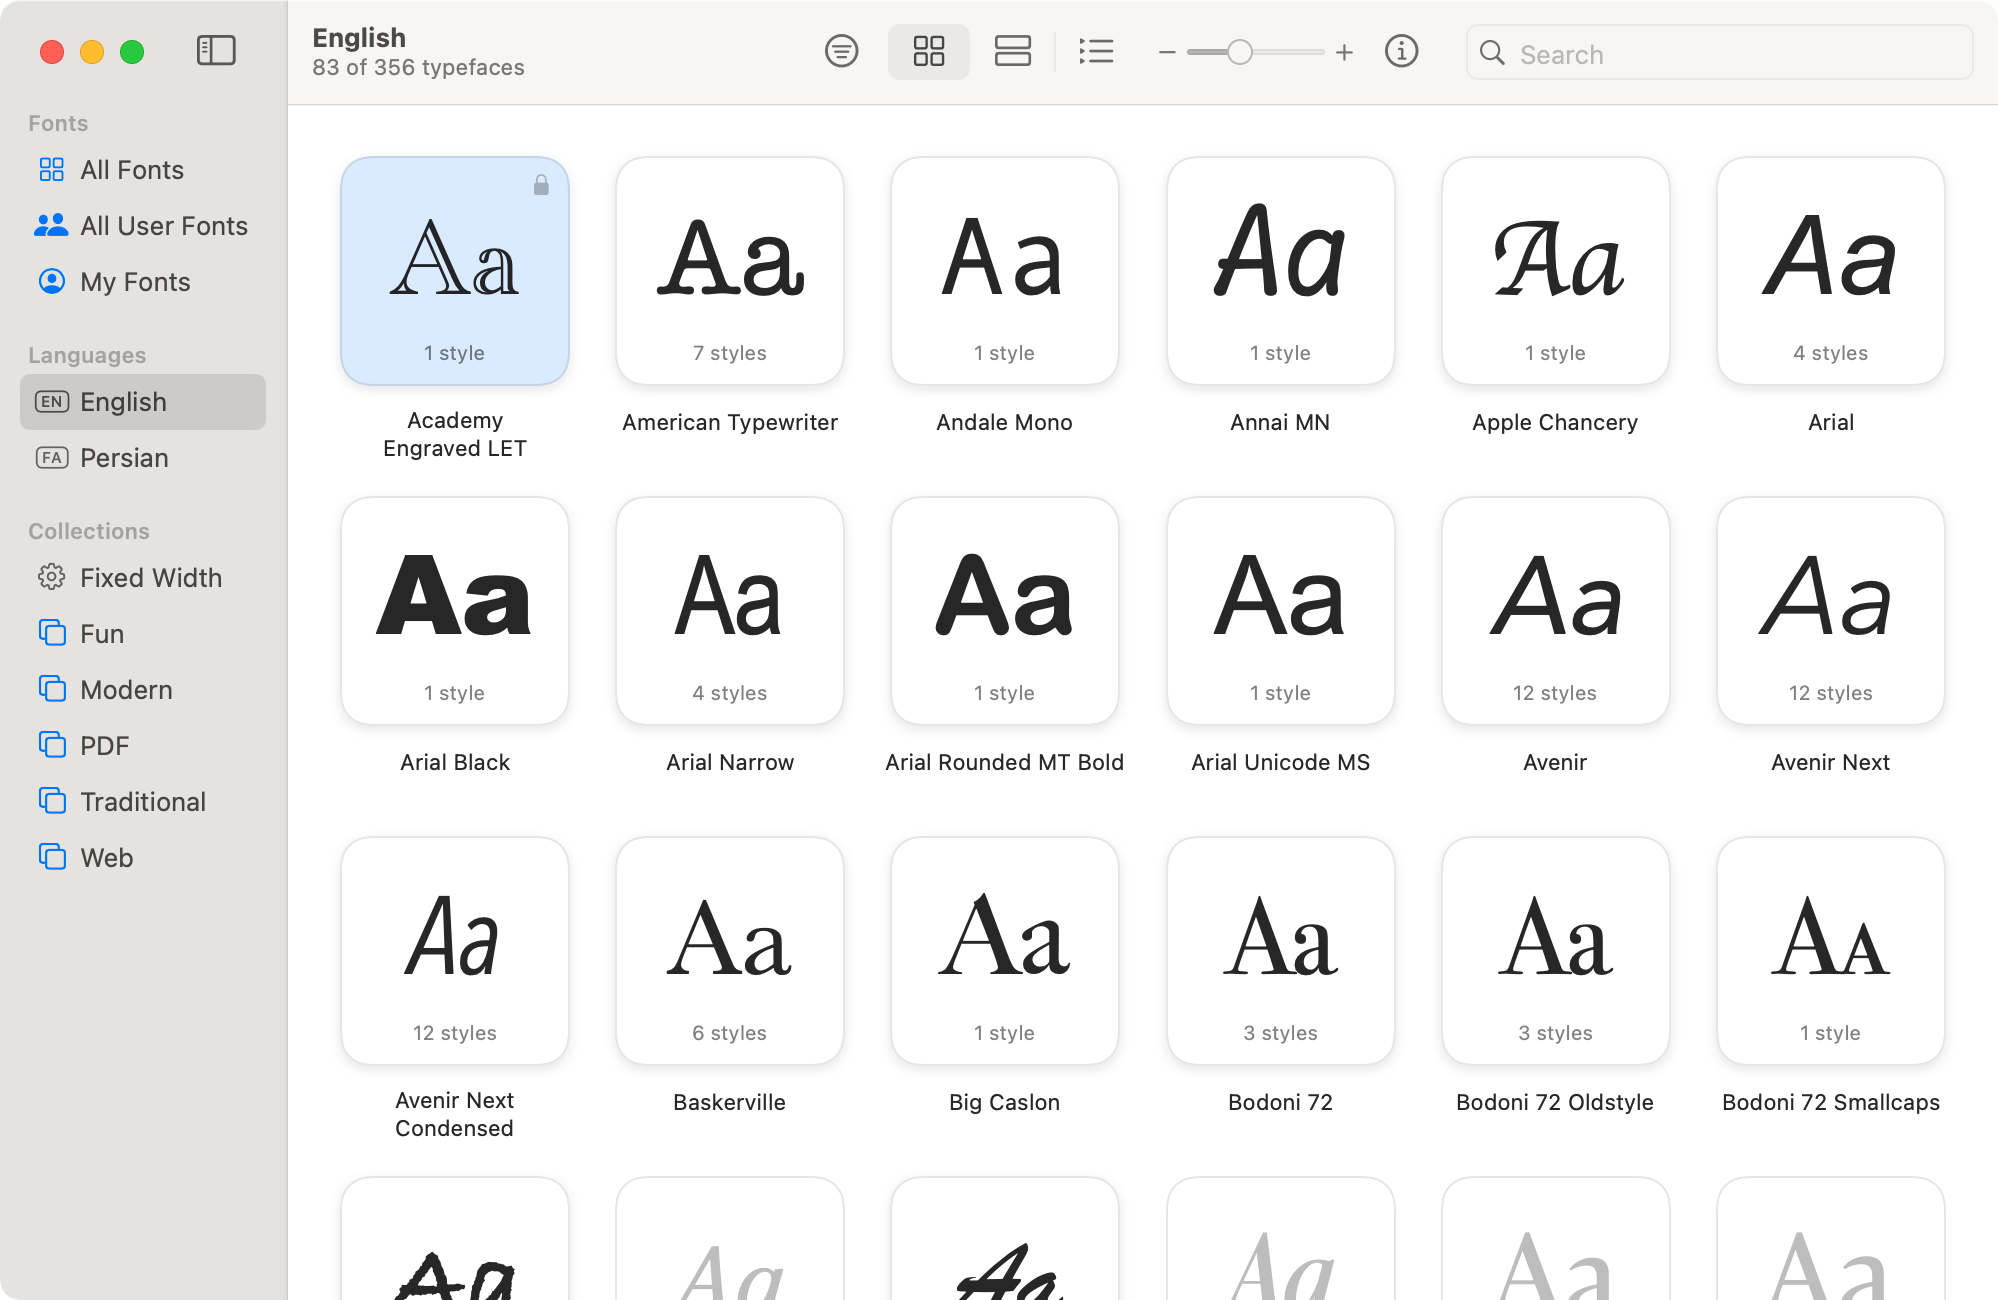
1. Grid View: Go to View > View As Grid or press ⌘+1. In this view, each font shows as a thumbnail with a few characters. It’s perfect for a quick glance at all your fonts.
 TubeDigger - online video downloader from mostly any site
2. Samples View: Want a closer look? Choose View > View As Samples or press ⌘+2. Each font appears in a full-width preview with a “The quick brown fox…” sentence example. You can’t see many fonts at once, but it’s great for checking out how each font looks in practice.

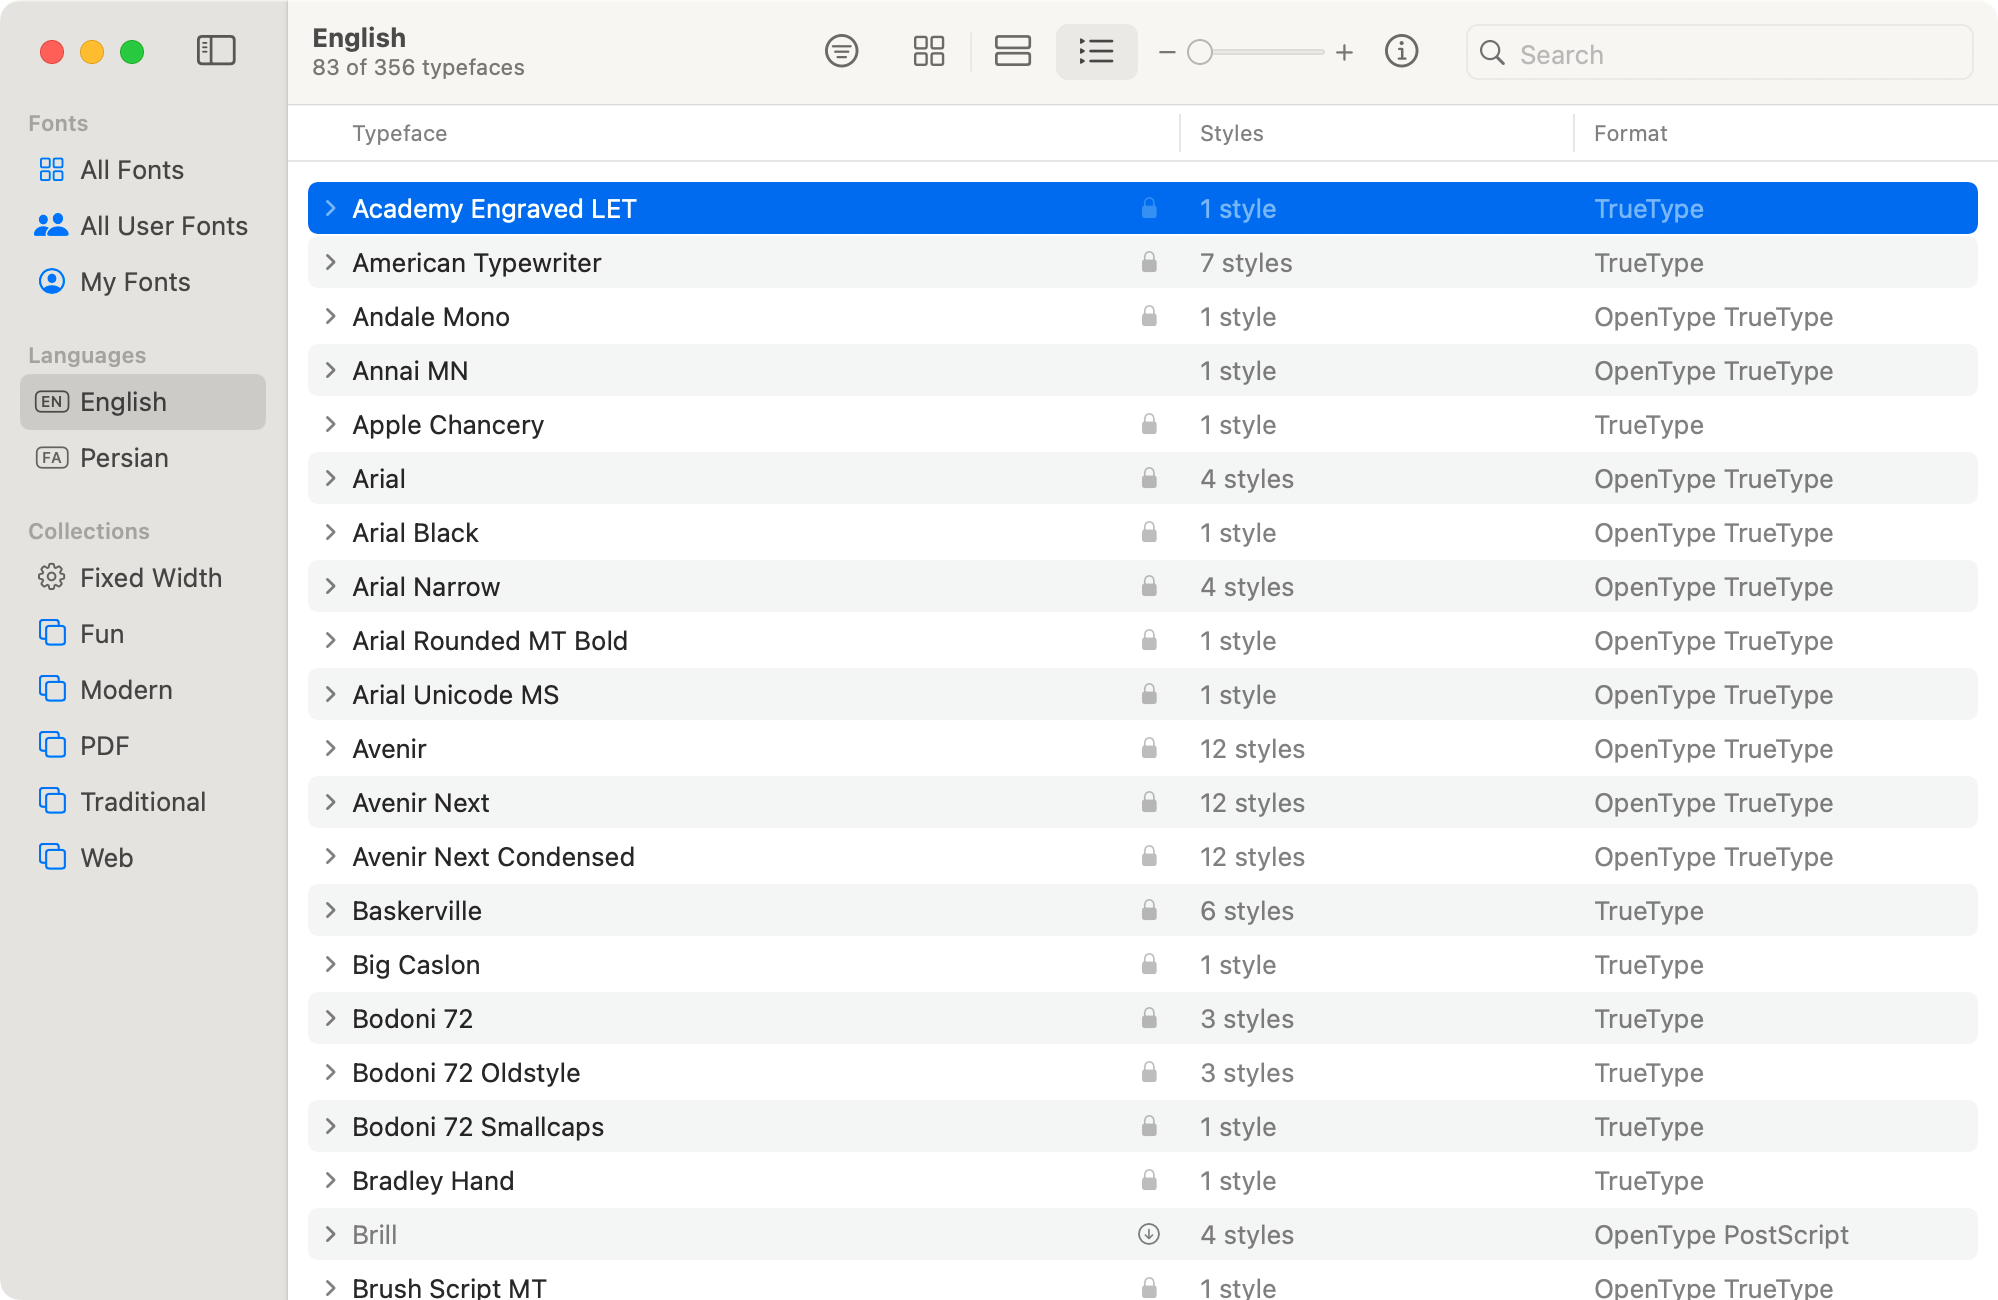
3. List View: For a details-first approach, go to View > View As List or press ⌘+3. This sorts your fonts into a list, with font families in expandable sections, similar to folders in Finder. Click to expand or collapse them.

Another way to switch between the Grid, Samples, and List views is by clicking the relevant icons on the toolbar.
To check out a font or font family in more detail, double click it. The font pops up in the main part of the window. To change the size of your fonts when previewing them in Font Book, use the slider at the top (with the minus and plus symbol on either side.)
How to Install a Font
If a default system font within Font Book is colored gray instead of black, it means the font isn’t downloaded to your local machine. To fix that, right-click it and select “Download.” The font is automatically activated, so you don’t need to worry about that.
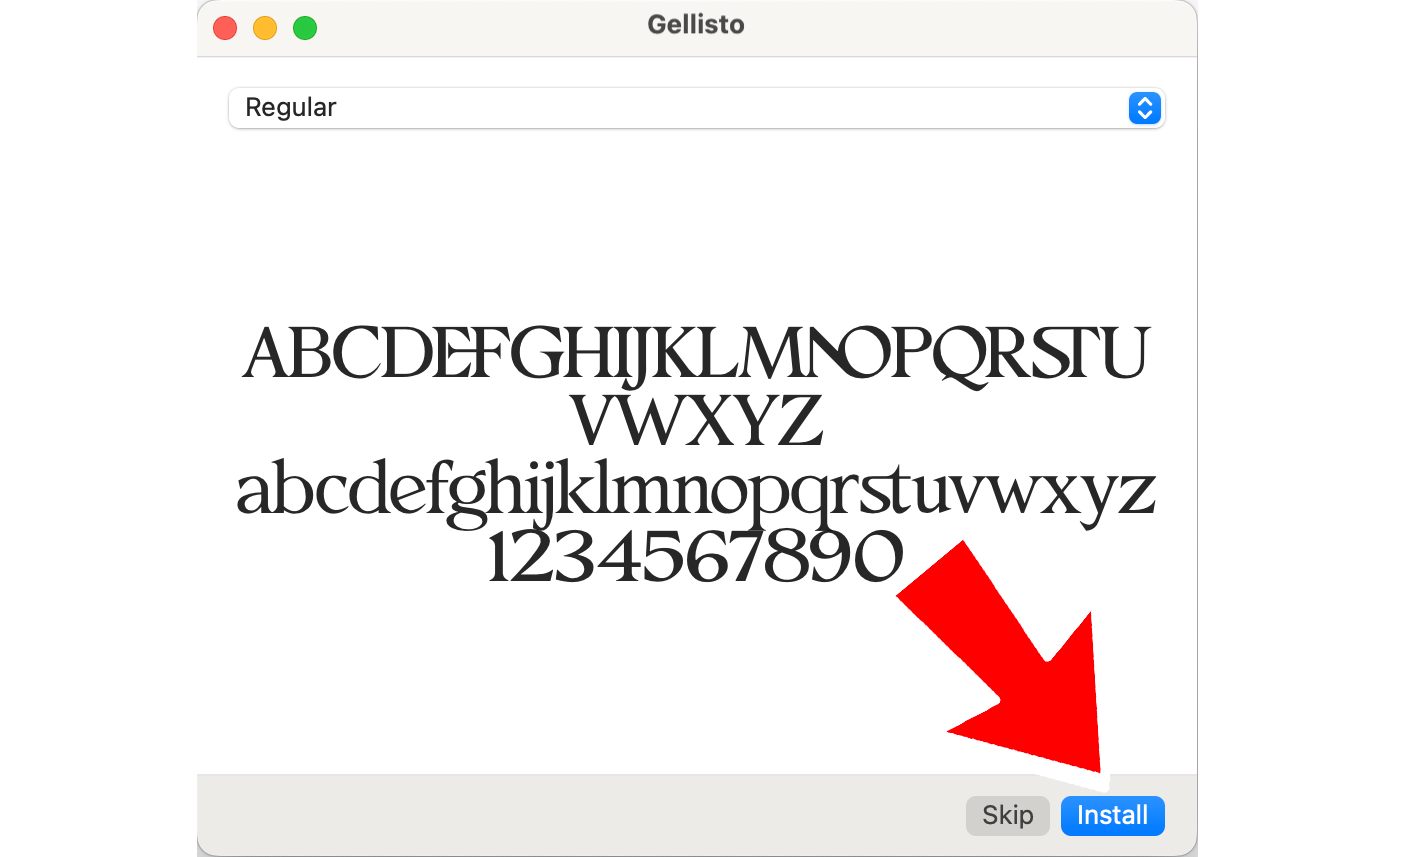
If you want to go beyond the default fonts included with macOS, there are plenty of free font websites . To install a new font you’ve downloaded, double-click the font in Finder, and Font Book opens and shows you a preview. Click “Install” and you’re all set.
If you prefer installing a font from Font Book, go to File > Add Fonts (or press ⌘+O). A window opens where you can choose the font(s) you want to install. Once ready, click “Open.”
Avoid going overboard with font installations. Installing more fonts than you actually use can lead to sluggish performance in certain apps and create an overwhelming font menu.
 Allavsoft Batch Download Online Videos, Music Offline to MP4, MP3, MOV, etc format
How to Install Fonts for All Users
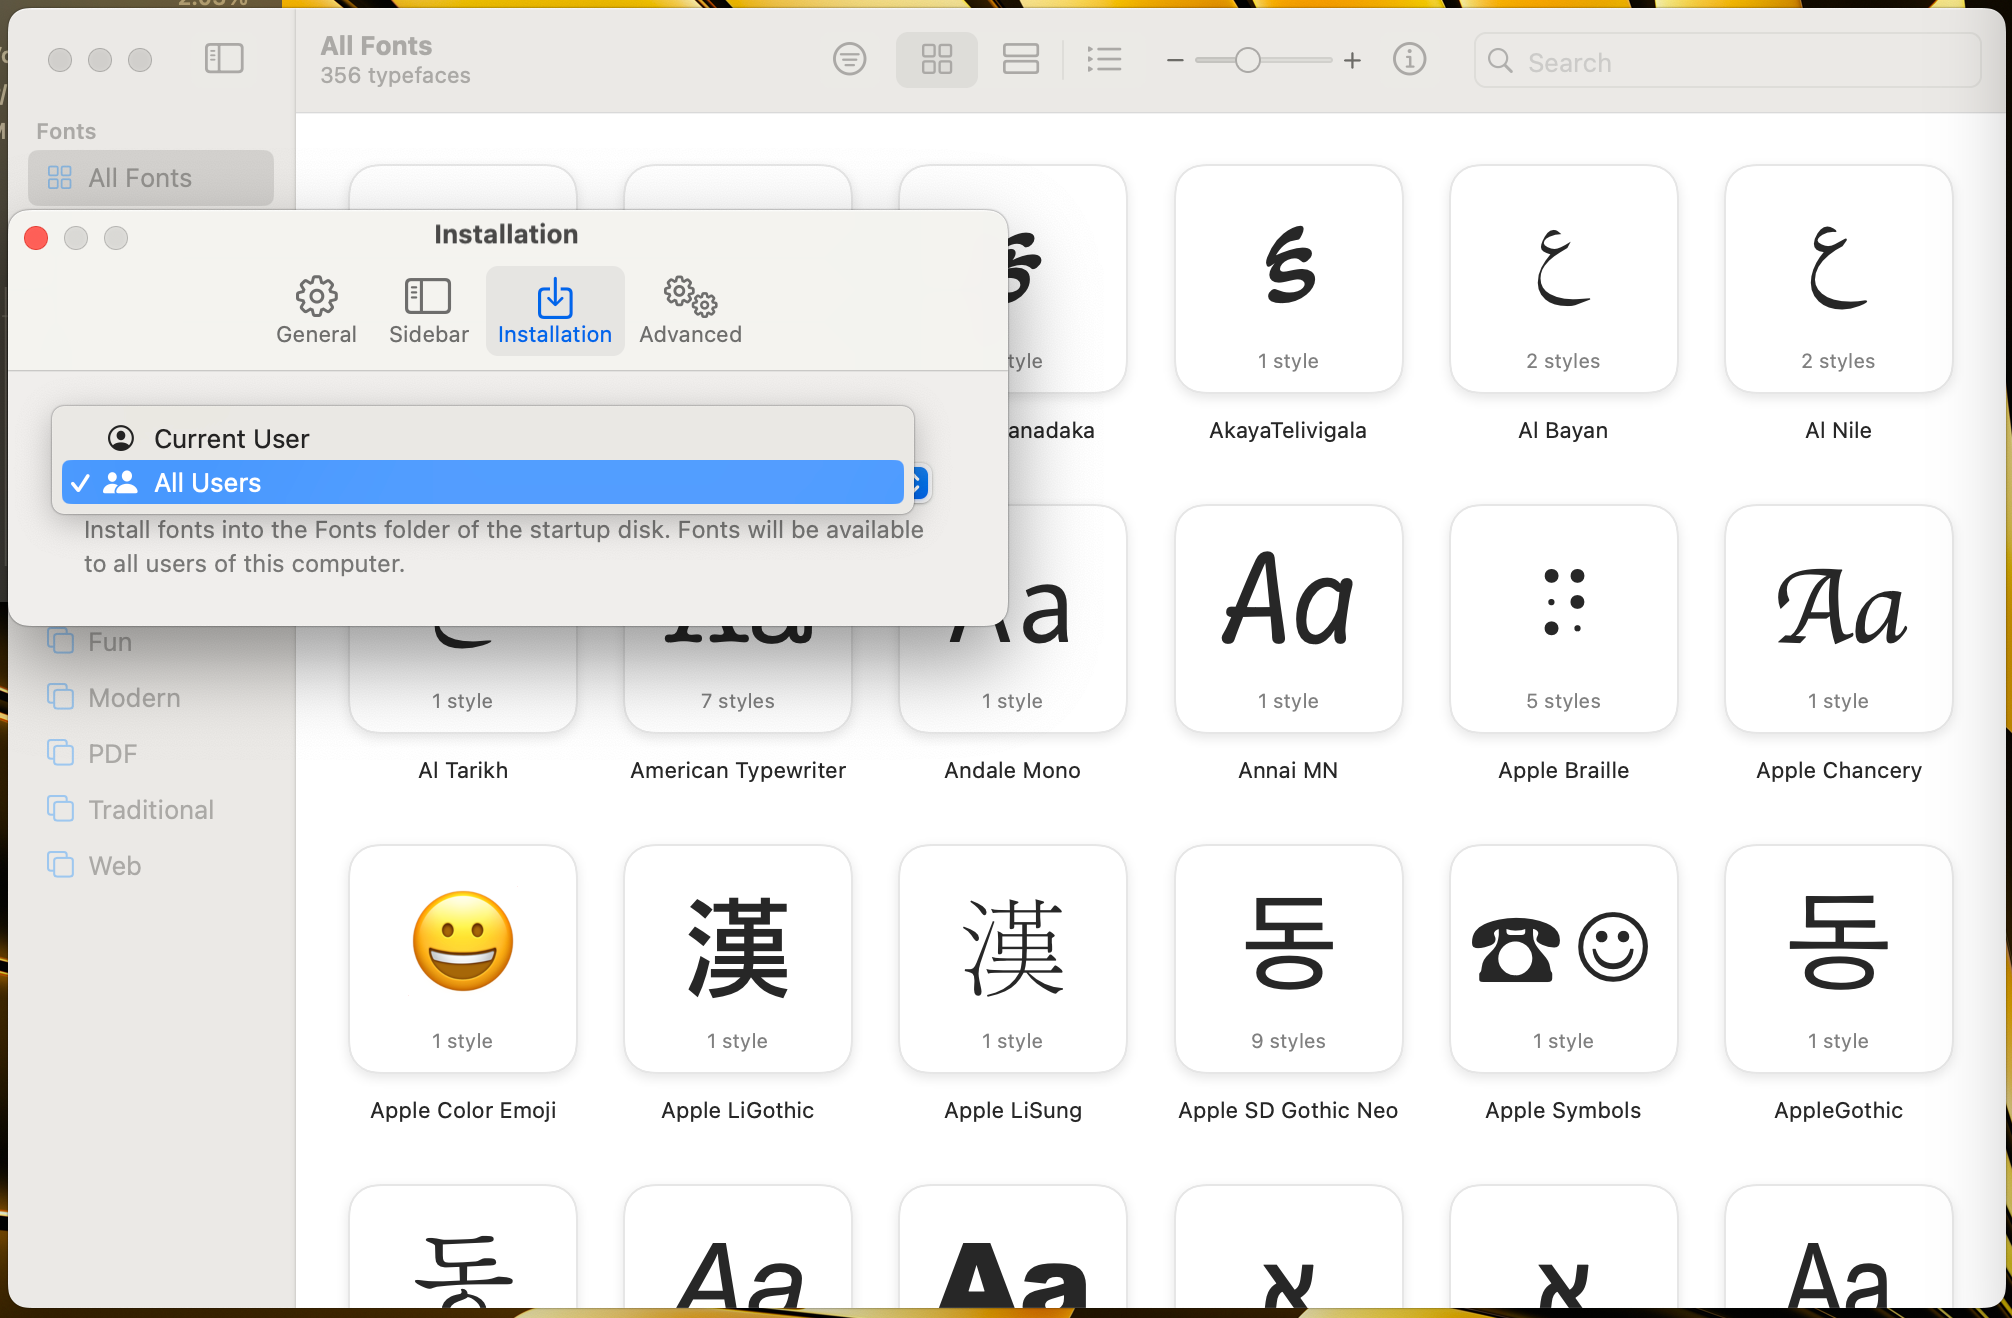
By default, Font Book installs new fonts just for your account. They reside in the invisible Library folder “/Users/Home/Library/Fonts”. But, if you want all users on your Mac to have access to the fonts, go to Font Book > Settings > Installation. Select the “Default Install Location” menu and choose “All Users.” This setting shares your fonts in the main folder “/Library/Fonts”.
Power Tools add-on for Google Sheets, 12-month subscription
How to Deactivate or Remove a Font
If you don’t want a font to be selectable across your system, it’s simple. Find it in Font Book, right-click it, and select “Deactivate.” If you change your mind, repeat the steps but select “Activate.”
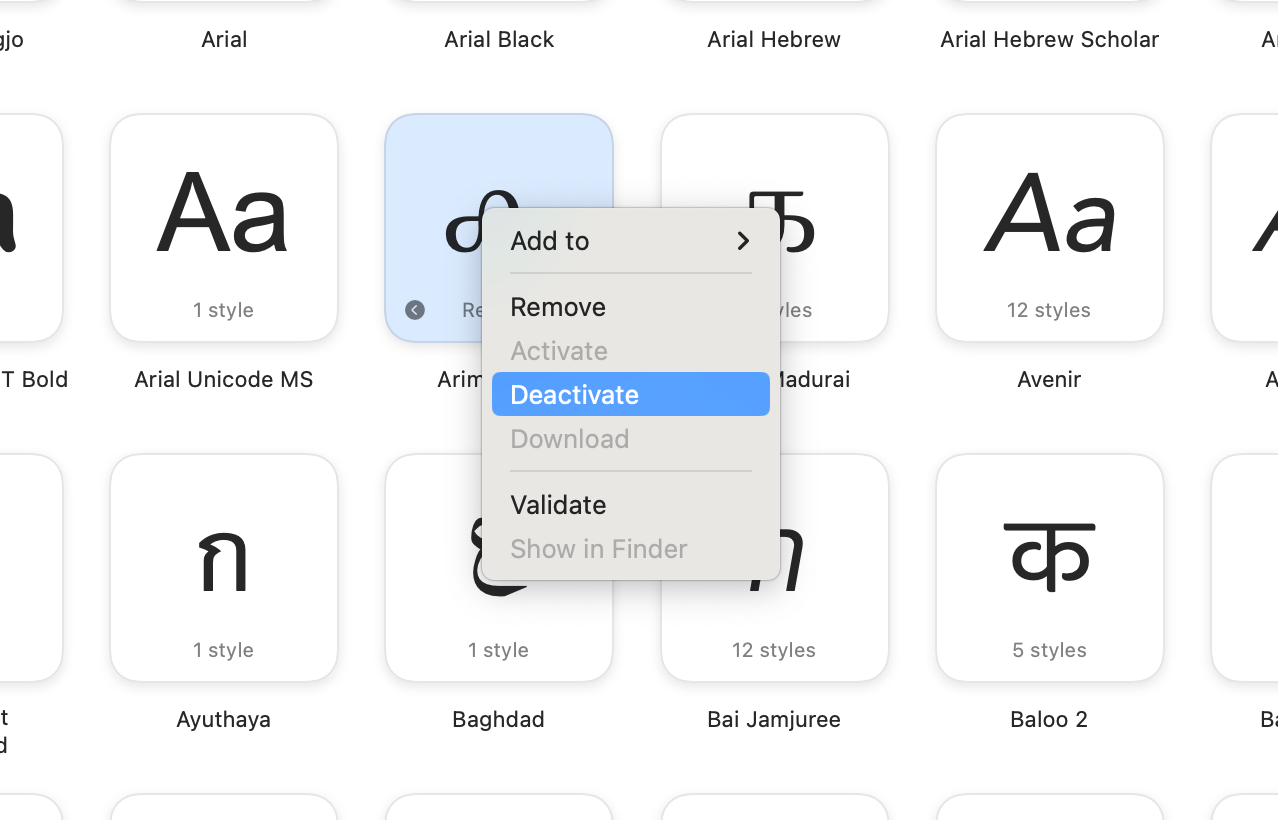
Alternatively, to delete it entirely, select “Remove.” However, note that Font Book won’t let you deactivate or delete any fonts that macOS needs to operate, like Arial, Times New Roman, and Avenir.
If any font starts misbehaving, like displaying incorrect characters, you can validate your fonts in Font Book . Just select “Validate” from the context menu.
How to Organize Your Fonts Into Collections
A font collection is a way of grouping fonts, like if they share a common theme, style, or purpose. It allows you to easily access and manage these fonts.
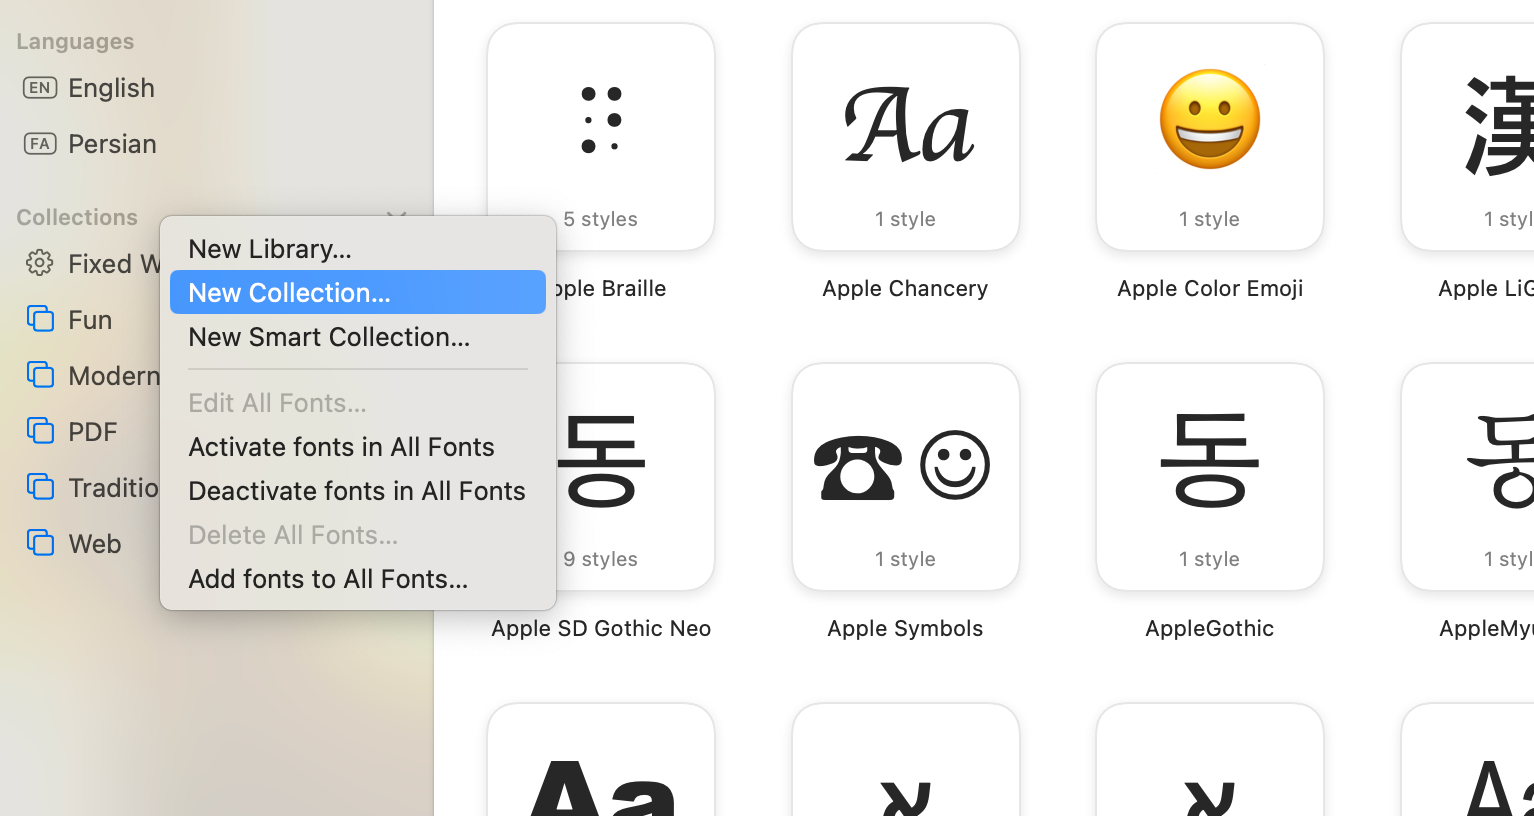
To create a font collection in Font Book, go to File > New Collection or right-click on the sidebar and choose “New Collection.” If the sidebar is not visible, go to View > Show Sidebar.

Select the fonts you want to include in your collection (you can choose them from an existing collection, if needed.) To do that, click and drag to highlight multiple fonts, or use the Command key to select non-contiguous fonts. Then, drag the fonts to the collection, or right-click and use the “Add to” menu.

Finally, double-click the collection name to retitle it and make it easy for you to identify later.
To remove a font from a collection, go into the collection, right-click the font you want to ditch, select “Remove”, then click “Remove Fonts” to confirm.
Collections in Font Book are virtual groups, and the fonts themselves remain in their original locations on your system. So, even after removal from the collection, the font remains accessible in Font Book and the Fonts window.
Whether you’re a rookie publisher or a professional designer, managing your fonts is an essential skill. You’ll improve the design and readability of your projects. Just remember not to go overboard with installing them!
- Title: Step-by-Step Instructions: Mastering Font Management for Apple Computers
- Author: Frank
- Created at : 2024-08-29 01:36:56
- Updated at : 2024-08-30 01:36:56
- Link: https://tech-revival.techidaily.com/step-by-step-instructions-mastering-font-management-for-apple-computers/
- License: This work is licensed under CC BY-NC-SA 4.0.