Step-by-Step Guide: Adding Applications to Your macOS Dock

Step-by-Step Guide: Adding Applications to Your macOS Dock
Quick Links
Key Takeaways
- To add an app to your Mac’s Dock, open Finder, navigate to Go > Applications, then drag the icon from the Application window to your Dock.
- If an app is active, right-click the icon on the Dock and navigate to Options > Keep on Dock to permanently pin it.
- Remove an app from the Dock by dragging its icon off the dock or by right-clicking and selecting “Remove from Dock” under “Options.”
If you need to use a particular app on your Mac frequently, it’s easy to add it to your Dock. Once there, your favorite app is only one click away at any time. Here’s how to do it.
Drag Application Icon to Dock
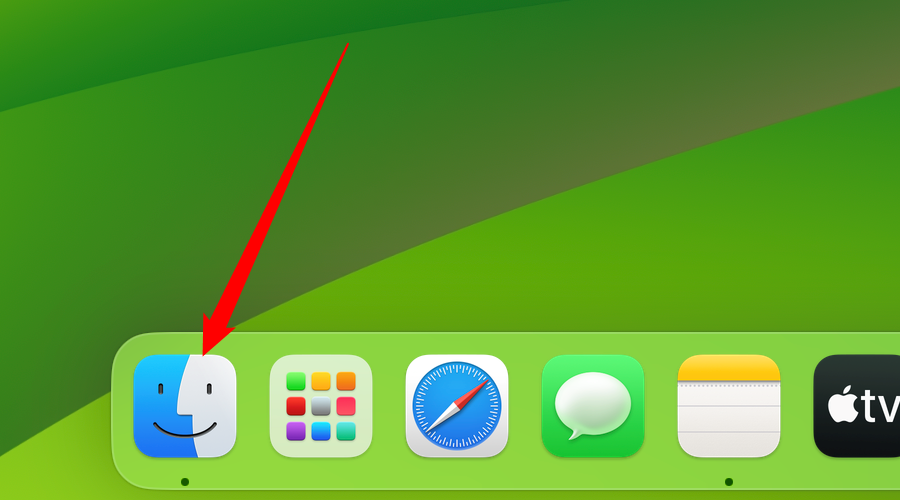
The easiest way to add an app to the Dock is to drag its icon there from Finder, which is the file management app for the Mac. First, click the Finder icon on your Dock to bring Finder to the foreground.
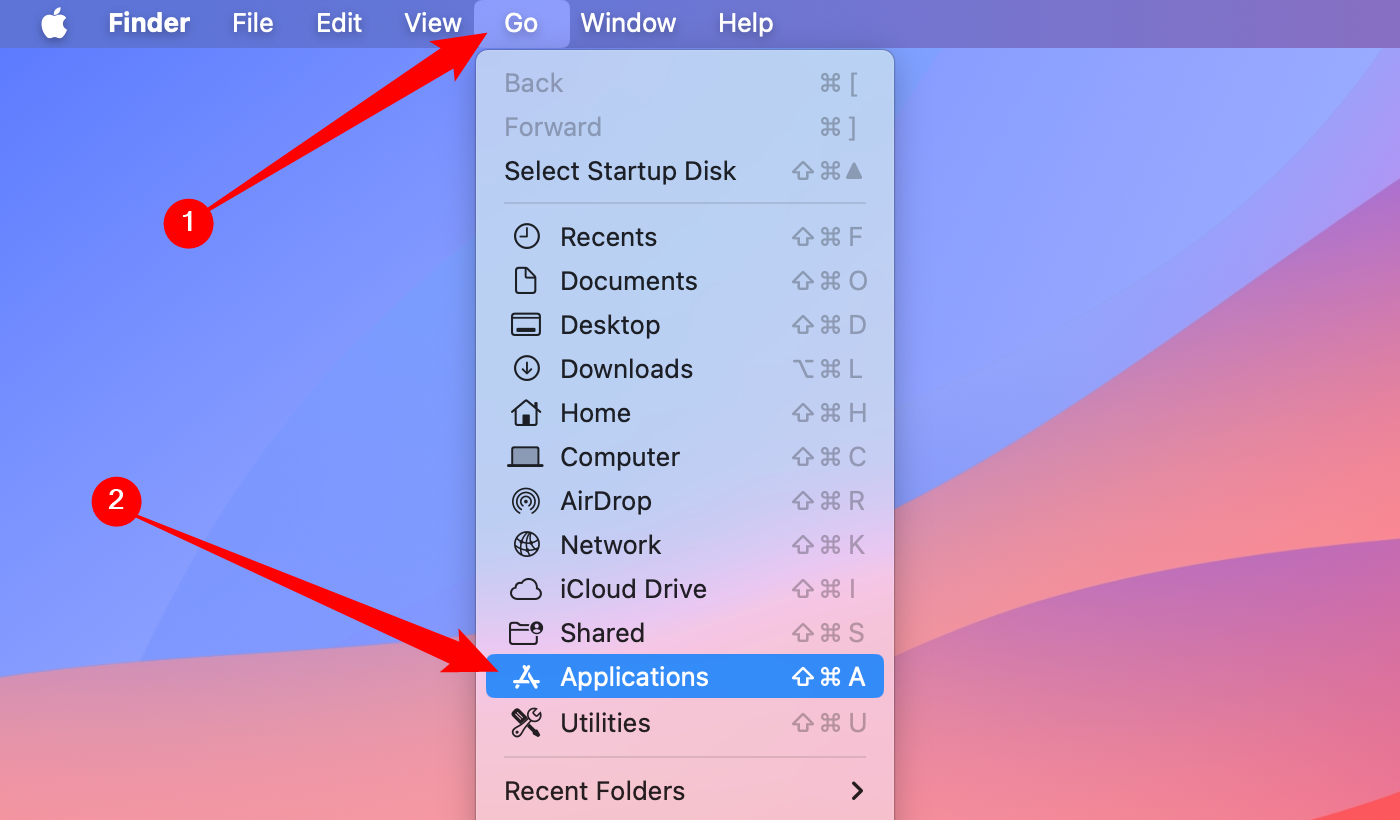
With Finder active, look at the menu bar across the top of the screen. Click “Go,” then select “Applications” from the list.
Your Applications folder will open in a Finder window. Locate the app that you want to put in the Dock, then click and drag its icon into the Dock.
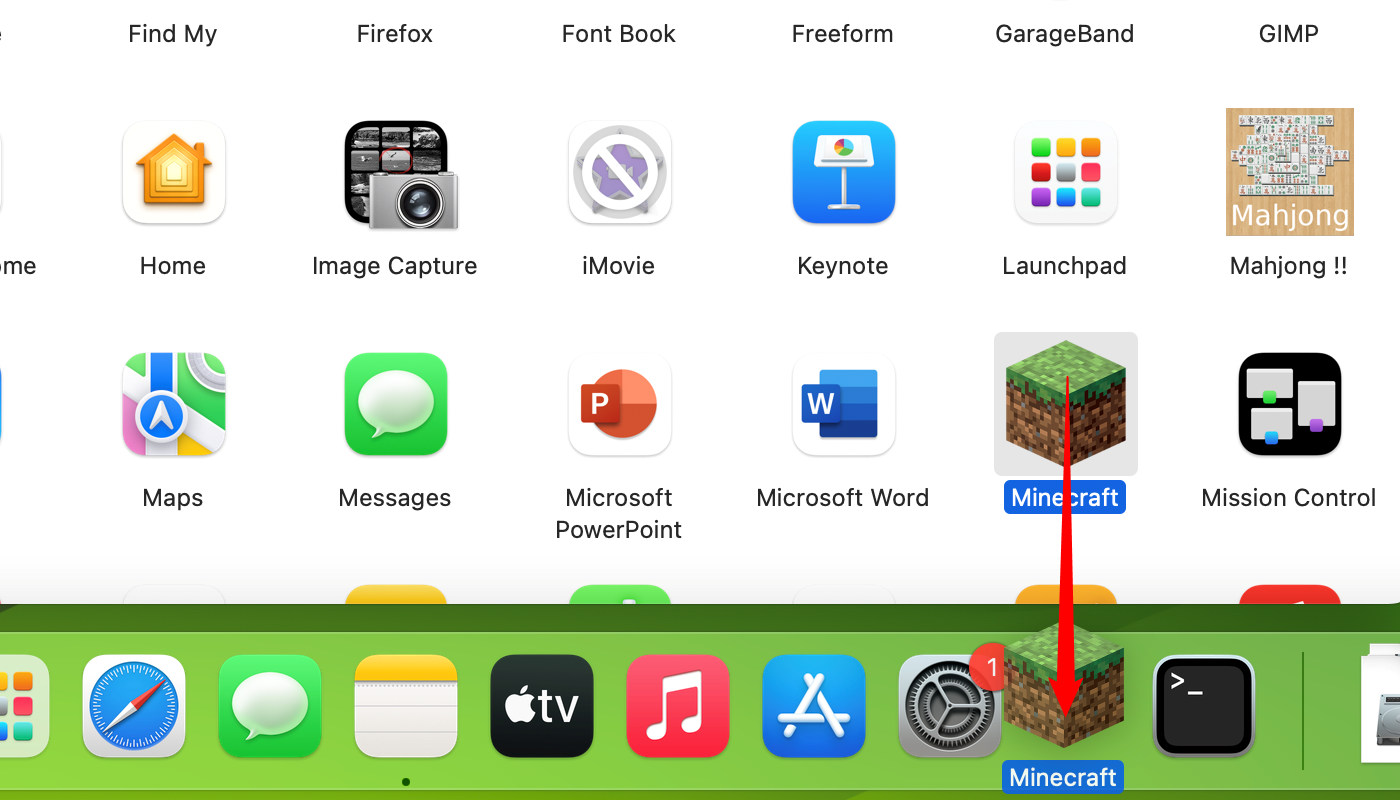
As you hover the icon over the Dock, you’ll notice that the other app icons will move aside and create a space between them. When you have the app icon positioned where you want it, release your mouse button and the app will pop into place in its full-size form.
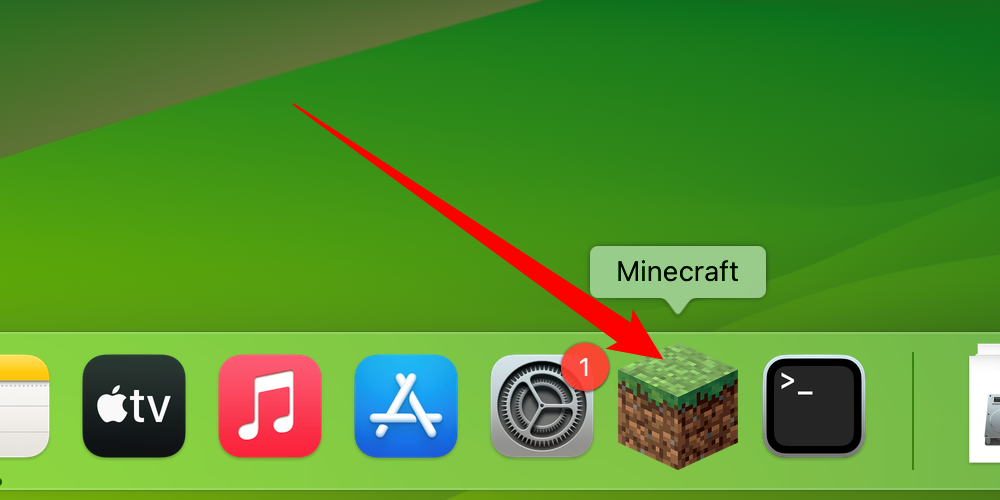
Any time you’d like to launch the app, just click its Dock icon once. Very easy!
Select “Keep in Dock”
There’s another easy way to add an icon to the Dock. Let’s say that you’ve already launched the app via Launchpad or Finder and its icon is currently sitting in your Dock because it’s already running.
To keep the app’s icon there even when it’s not running, just right-click the app icon and select “Options” > “Keep in Dock” from the menu that pops up.
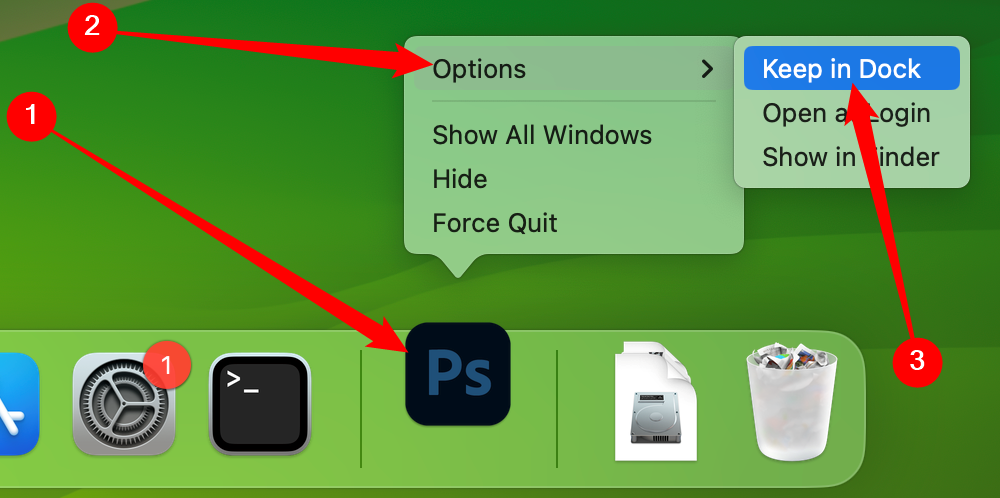
After that, even if you “Quit” the app, its icon will remain in your Dock for handy future access.
How to Remove an App from The Dock
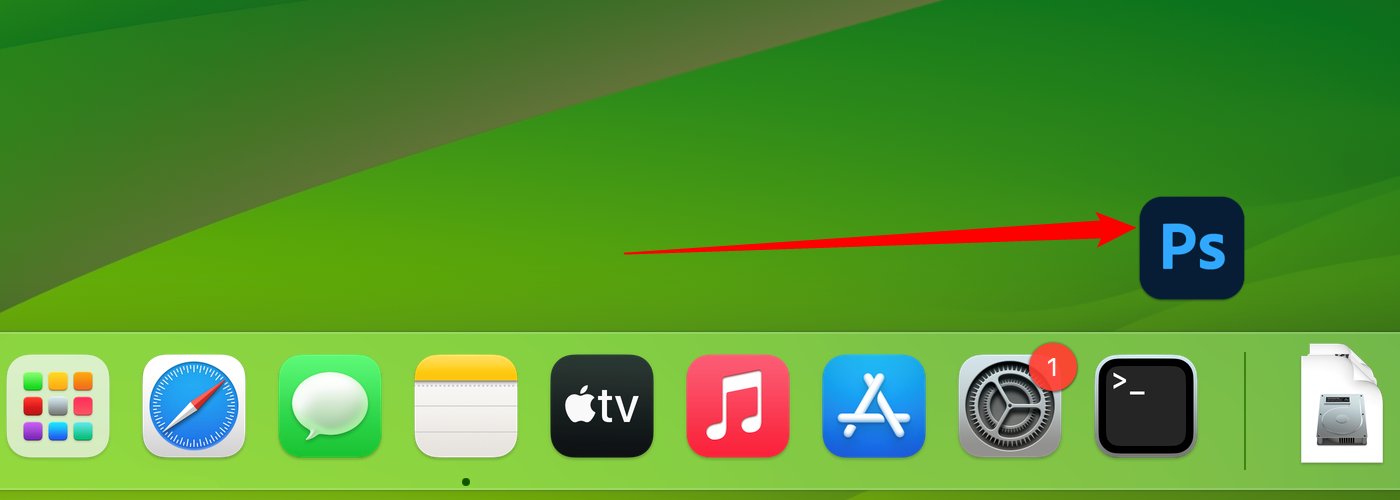
To remove an app from the Dock, click its icon and drag the icon away from the dock. Release your mouse button, and the icon will disappear.
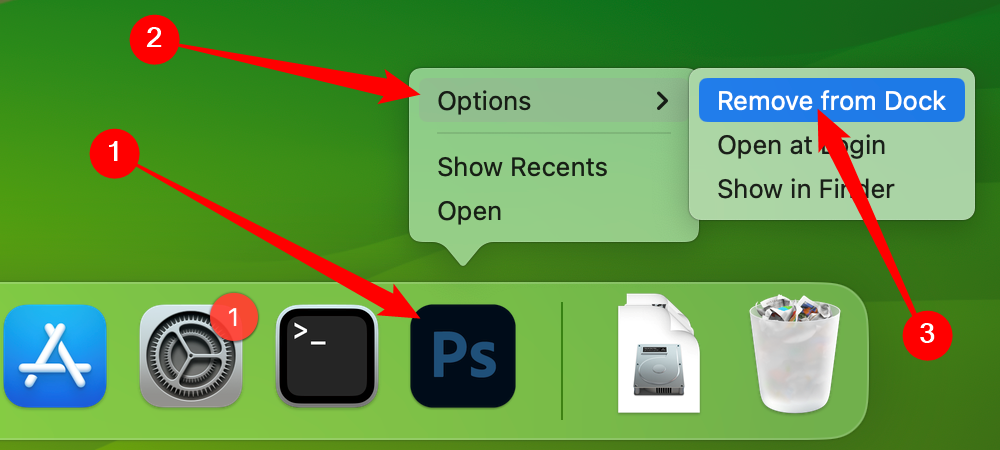
Alternately, you can right-click the icon in your Dock, select “Options” from the menu, and click “Remove from Dock.” This will remove the icon as well.
But don’t worry, you didn’t delete the app—it will still be in your Applications folder. You can find it again by using Launchpad , by opening the Applications folder, or by using Spotlight search . Happy computing!
- Title: Step-by-Step Guide: Adding Applications to Your macOS Dock
- Author: Frank
- Created at : 2024-08-29 01:36:54
- Updated at : 2024-08-30 01:36:54
- Link: https://tech-revival.techidaily.com/step-by-step-guide-adding-applications-to-your-macos-dock/
- License: This work is licensed under CC BY-NC-SA 4.0.


 Glarysoft File Recovery Pro Annually - Helps to recover your lost file/data, even permanently deleted data.