
Creality K1 Max Evaluation: Making Waves in the Popularity of 3D Printing
Creality K1 Max Evaluation: Making Waves in the Popularity of 3D Printing
Key Takeaways
- Big volume, fast speed, high automation are standout features of the Creality K1 Max.
- Easy setup and operation suitable for beginners, no manual leveling needed.
- Prints fast, but quality may be slightly compromised; issues like extruder blockages can occur.
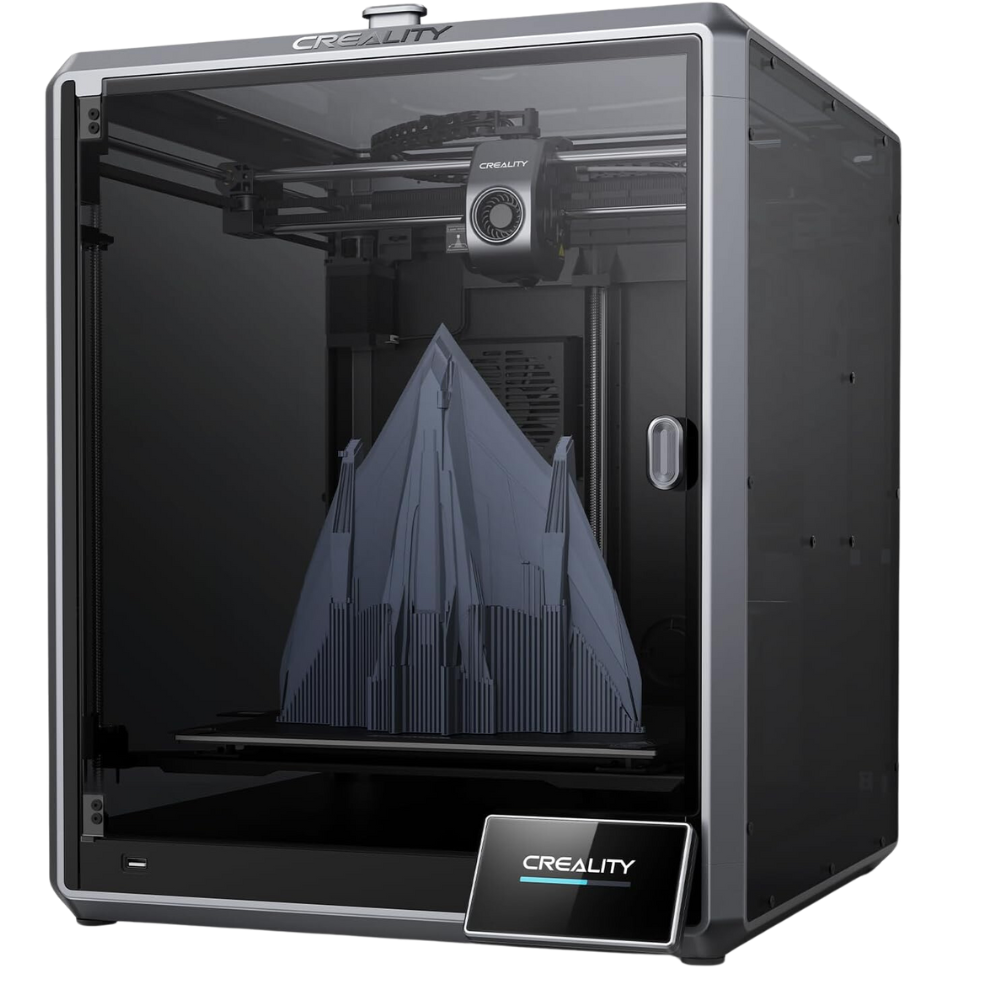
3D printers have long been the purview of enthusiasts working in a relatively small niche. However, now there’s a new generation of consumer-grade 3D printers that make the whole process easy enough that anyone can create objects in their home. The Creality K1 Max is one of the earliest examples of these next-generation printers, and I put it through the wringer to see if it lives up to that promise.

Creality K1 Max
9/ 10
The Creality K1 Max is a large volume consumer 3D printer with a high-speed Core XY design, and advanced AI-based automation systems.
Brand
Creality
Build Volume
11.8x11.8x11.8in
Printing Accuracy
0.1mm
Connectivity
Ethernet, USB, and Wi-Fi
Heated Build Plate
Yes
Feed Type
Direct Drive
Dimensions
17.12”D x 20.7”W x 18.18”H
Weight
40lbs
Dual-Color Printing
No
Multifunction
No
Pros
- Fast prints
- Large build volume
- Hands-off automated printing
Cons
- Some fast prints can be slightly sloppy
- Filament changes can be tricky at first
- Some prints need glue with the standard print bed
Expand
See at Amazon $899 at Creality
Big Volume, High Speed, High Automation
The Creality K1 Max is the larger sibling of the Creality K1, though they have other differences that go beyond size. Including teething troubles with the early models that have since been resolved , and were never present in the K1 Max. So, if you’re looking at the K1 as a more affordable option, be aware that they aren’t exactly the same printer just at different sizes.
With that out of the way, the most important vital statistics of the K1 Max is a build volume of 300 x 300 x 300mm, (11.8 inches a side), which is quite generous and means that you could, for example, print objects like helmets that a human could wear in one print. The other major claim to fame is a maximum speed of 600mm/s and 20,000mm/s² acceleration. Which also makes this one of the fastest printers you can buy. This is largely thanks to the Core XY type design the K1 Max uses, with an arrangement of belts and two motors to very precisely (and quickly!) position the head on the X and Y planes. The standard nozzle is 0.4mm, though this can be upgraded, and the thinnest layer height is 0.1mm.
There’s also quite a lot of AI technology built into the K1 Max, with a LiDAR scanner mounted on the print head, and a built-in webcam that (among other things) lets you watch the print remotely, and generates a neat time-lapse automatically.
Your browser does not support the video tag.
It’s in this area that the K1 Max really impressed me, since it uses all of these gadgets and algorithms to really automate the process of 3D printing. The LiDAR scanner is used for flow calibration so that it automatically sets the extrusion rate for the current filament. It does this by printing a test pattern and then scanning it. The scanner is also used to check the first layer of the print before proceeding, and if it picks up any issues it will alert you instead of wasting your material or time. Likewise, AI software uses the webcam feed to check for any issues, like model “spaghetti,” foreign objects, and so on.
Sydney Louw Butler / How-To Geek
You’ll also notice there are no manual leveling knobs. The printer is calibrated at the factory, and uses automated leveling that combines data from the LiDAR scanner as well as strain sensors on the print bed, letting it precisely and continuously angle the print bed to keep it level during the print.
The entire print volume is enclosed, though you can easily take the top lid off for materials like ABS, or to swap filament. It has a rear extraction fan with an air filter which helps with fumes, and then two cooling fans. One on the print head assembly itself, and then one on the side of the chamber that cools each layer as you print.

The Setup Experience Is Virtually Turnkey
First off, I did not get to unbox and set up my K1 Max, because the shop where I bought it from insists on setting up and testing every printer they sell before letting it out of the door. However, the setup of the K1 Max is dead simple, as you can see in the official setup video.
It really is a quick process, and simply involves removing protective film, installing the door handle, plugging in the screen, and then removing the clearly-marked locking screws that keep the printer safe during transport.
Compared to the very first printers I had to set up almost a decade ago, and even compared to my more recent Creality Ender 5 S1 , this is as close to a turnkey 3D printer as I’ve ever seen. Anyone can set this system up, in my opinion, even if you have no prior experience with 3D printers. Just follow the instructions, and you’ll be printing your first model in under 30 minutes from opening the box.

Built Like a Tank
Many of the printers I’ve tried over the years come across as a little rickety, often due to the DIY nature of their design and how much assembly you have to do as the user. The K1 Max, on the other hand, is the first mainstream 3D printer that I’ve personally tried that feels like a finished product. The frame is solid, and the entire device is all rigid. It feels and looks more expensive than it is, and wouldn’t look out of place in a sci-fi movie.
Only time will tell if this perception of build quality translates into actual longevity, but it’s not an exaggeration to say that this is likely the nicest 3D printer Creality has yet built.

WPS Office Premium ( File Recovery, Photo Scanning, Convert PDF)–Yearly
Easy Enough for Your Grandparents to Use
I consider myself moderately experienced with 3D printing, and this is from a time when you’d have to be incredibly hands-on both with the software and hardware side of things. The K1 Max is as close to a “fire and forget” solution as I’ve seen, though I have yet to try its other next-generation competitors from manufacturers like Bambu Labs.
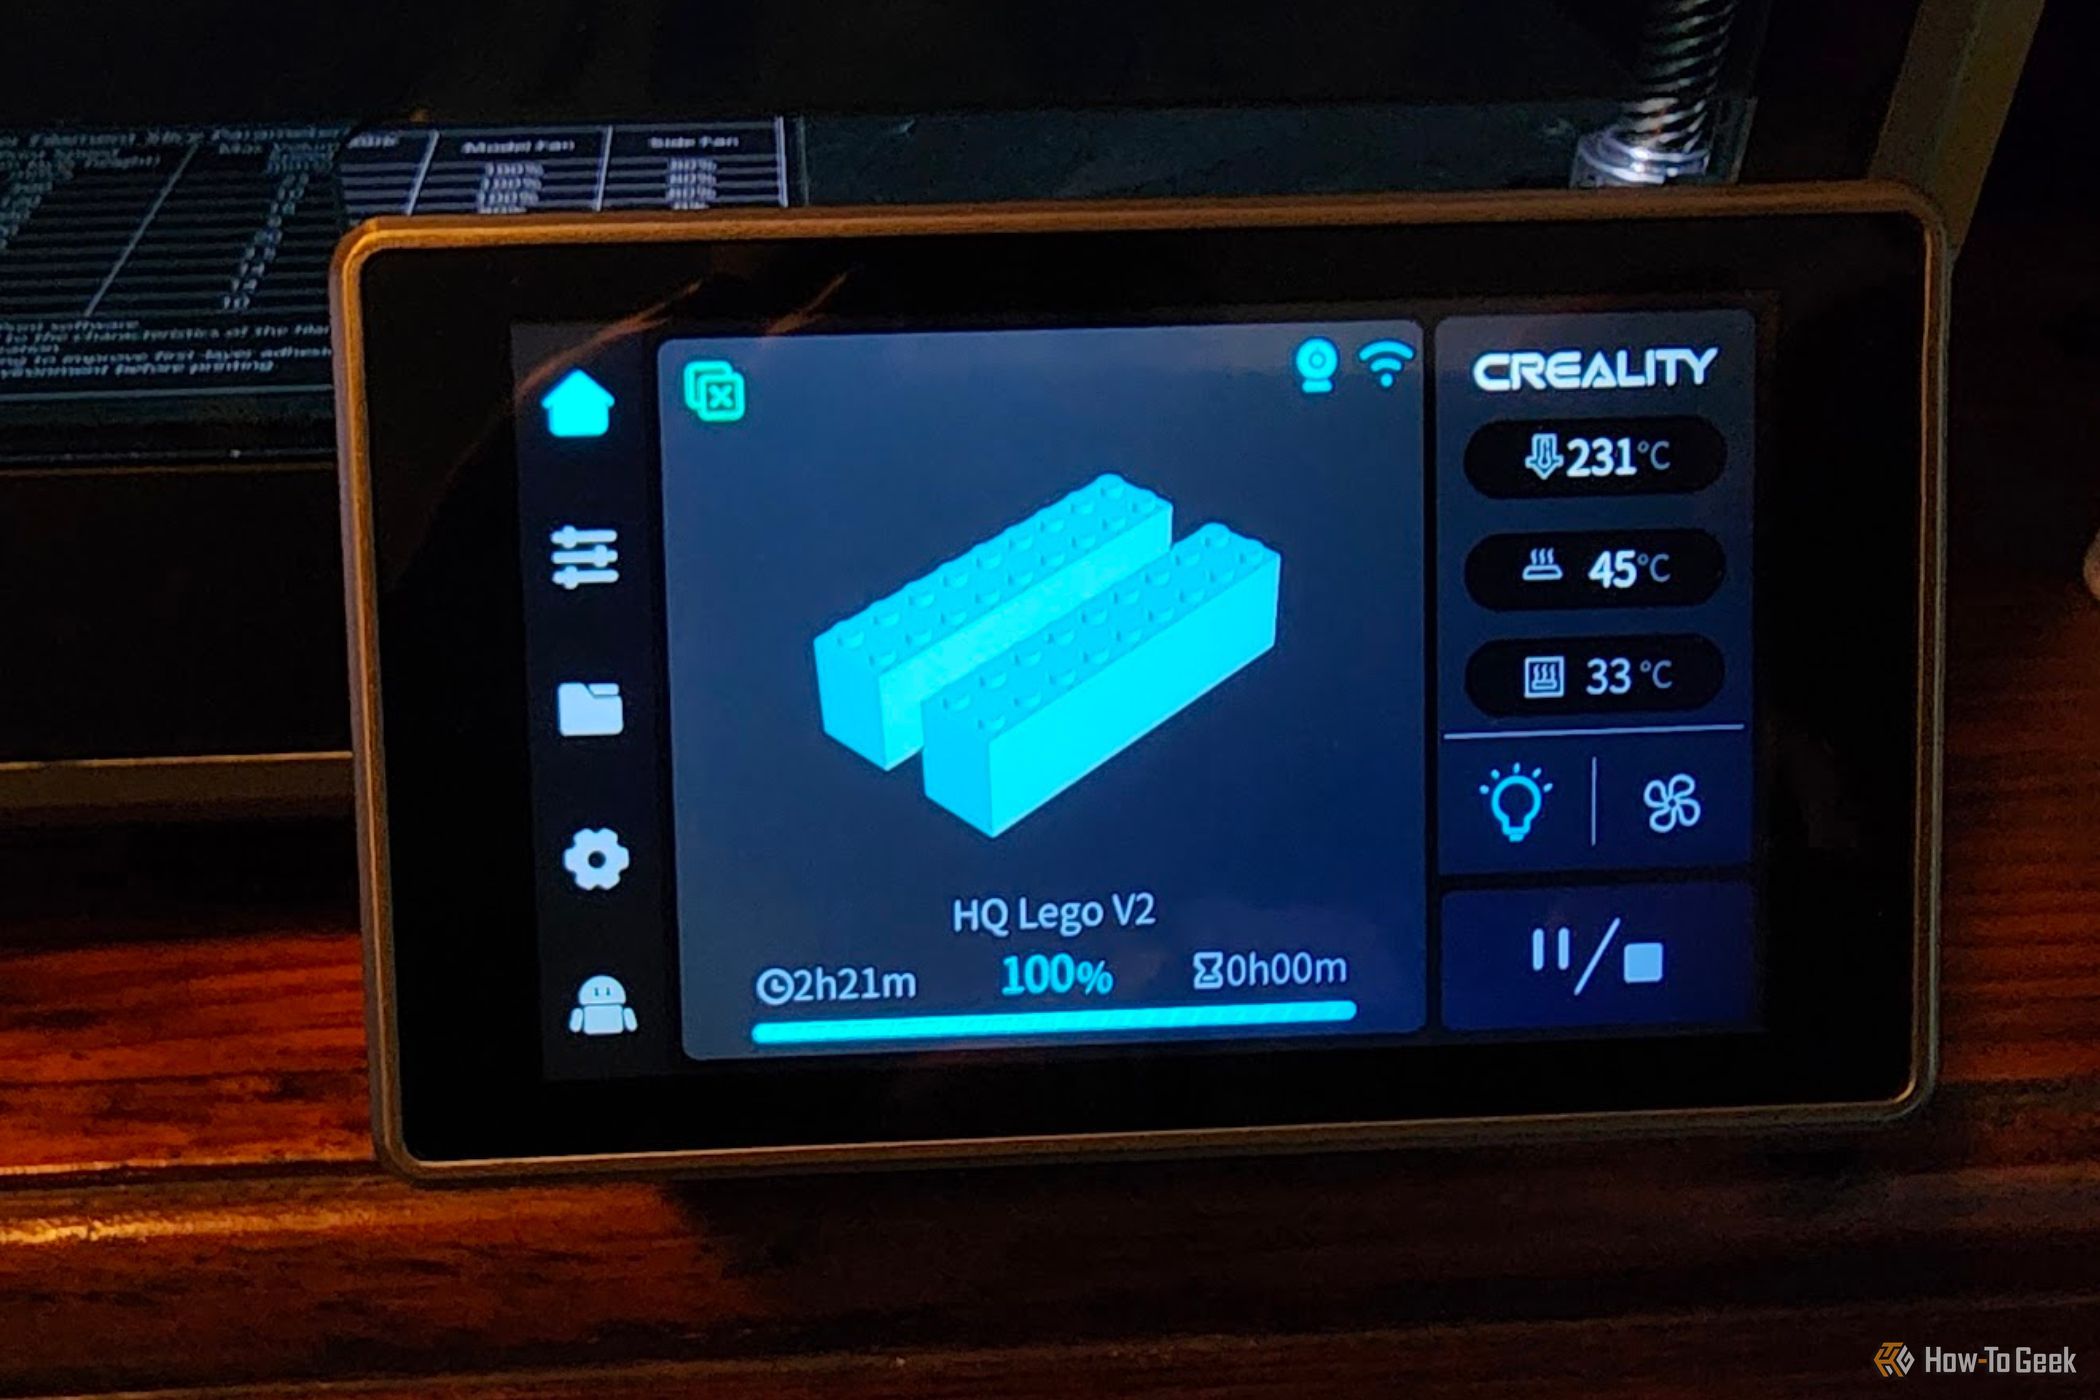
From the point where your model is sliced and ready to go, things could not be easier. The K1 has 8GB of internal memory, so you can easily send it Gcode (the printing data) over Wi-Fi or Ethernet, or simply plug a USB drive into the front port and copy your model over. Once a model is ready to print, it’s as easy as tapping it in the menu, and hitting “print.”
Sydney Louw Butler / How-to Geek
Unless there’s something wrong with the model or with how it was sliced, I didn’t experience any print failures that were a result of a systematic weakness in the printer itself. I tried a huge variety of shapes, sizes, details, and textures. Printing nearly 100 models before writing this review. The success rate was just over 95% for the prints I attempted.
Fast With “OK” Quality

 The BootIt Collection covers multi-booting, partitioning, and disk imaging on traditional PC’s using the standard BIOS and newer PC’s using UEFI. The collection includes BootIt Bare Metal (BIBM) for standard BIOS systems and BootIt UEFI (BIU) for UEFI system.
Sydney Louw Butler / How-to Geek
The K1 Max comes with a roll of Creality Hyper PLA filament, and a pre-loaded “benchy” boat, which is traditionally used to test a printer’s settings and quality. This model has been sliced for the K1 Max to show off its speed, and just over 15 minutes after pressing the print button, the benchy is done. It’s quite something to behold as the print head becomes a blur while slinging out a small boat.
Your browser does not support the video tag.
However, at that speed the result of the benchy is what I would describe as only acceptable for a draft print, not something you’d actually want to use. Incidentally, despite Creality insisting that their Hyper PLA is needed for this high-speed printing, I tried the fast benchy with cheap, generic PLA, and it came out exactly the same.
Not that it matters much, because in all honesty, this fast printing is little more than a party trick to wow new owners. In reality, I only used the standard and high quality presets which print at a comparatively sedate pace. Yet, printing the same print at a similar quality on both my K1 Max and Ender 5 S1 would see the Max finish significantly faster. A twelve-hour print on the Ender 5 would be a six-hour print on the Max. Of course, this depends on the details of the print, but there’s no denying that the K1 is the fastest printer I’ve used.
I think, after watching it for a few cumulative hours, that it’s all about that acceleration. Even if it’s printing slowly and carefully for better detail, when it’s traversing to the next part of the layer where it needs to lay down filament, it’s putting the gas pedal all the way down. That shaves seconds off all the parts of the print where the filament isn’t actually coming out of the nozzle, and it adds up.
Combined with a large print bed footprint, this makes the K1 Max the perfect printer for making a plate full of duplicate models, which is exactly what I did. Printing five, six, seven, or 10 copies of a model all arranged on the bed overnight was a breeze, and that speedy movement from one model to the next makes the print times highly manageable.
As for the quality, I was happy with most models at the standard 0.2mm layer height, but some with steep angles had pronounced layer lines which virtually went away when printing at the highest 0.1mm quality. That makes sense since it means you’re doubling the layer resolution, but usually, you’d want to save time by using standard quality. However, I found the time impact of printing at the highest quality to be minor and well worth it. For example, a five-hour print at standard quality would become a six-hour print at the highest quality. A fair tradeoff, though again the specifics of the print will impact this.
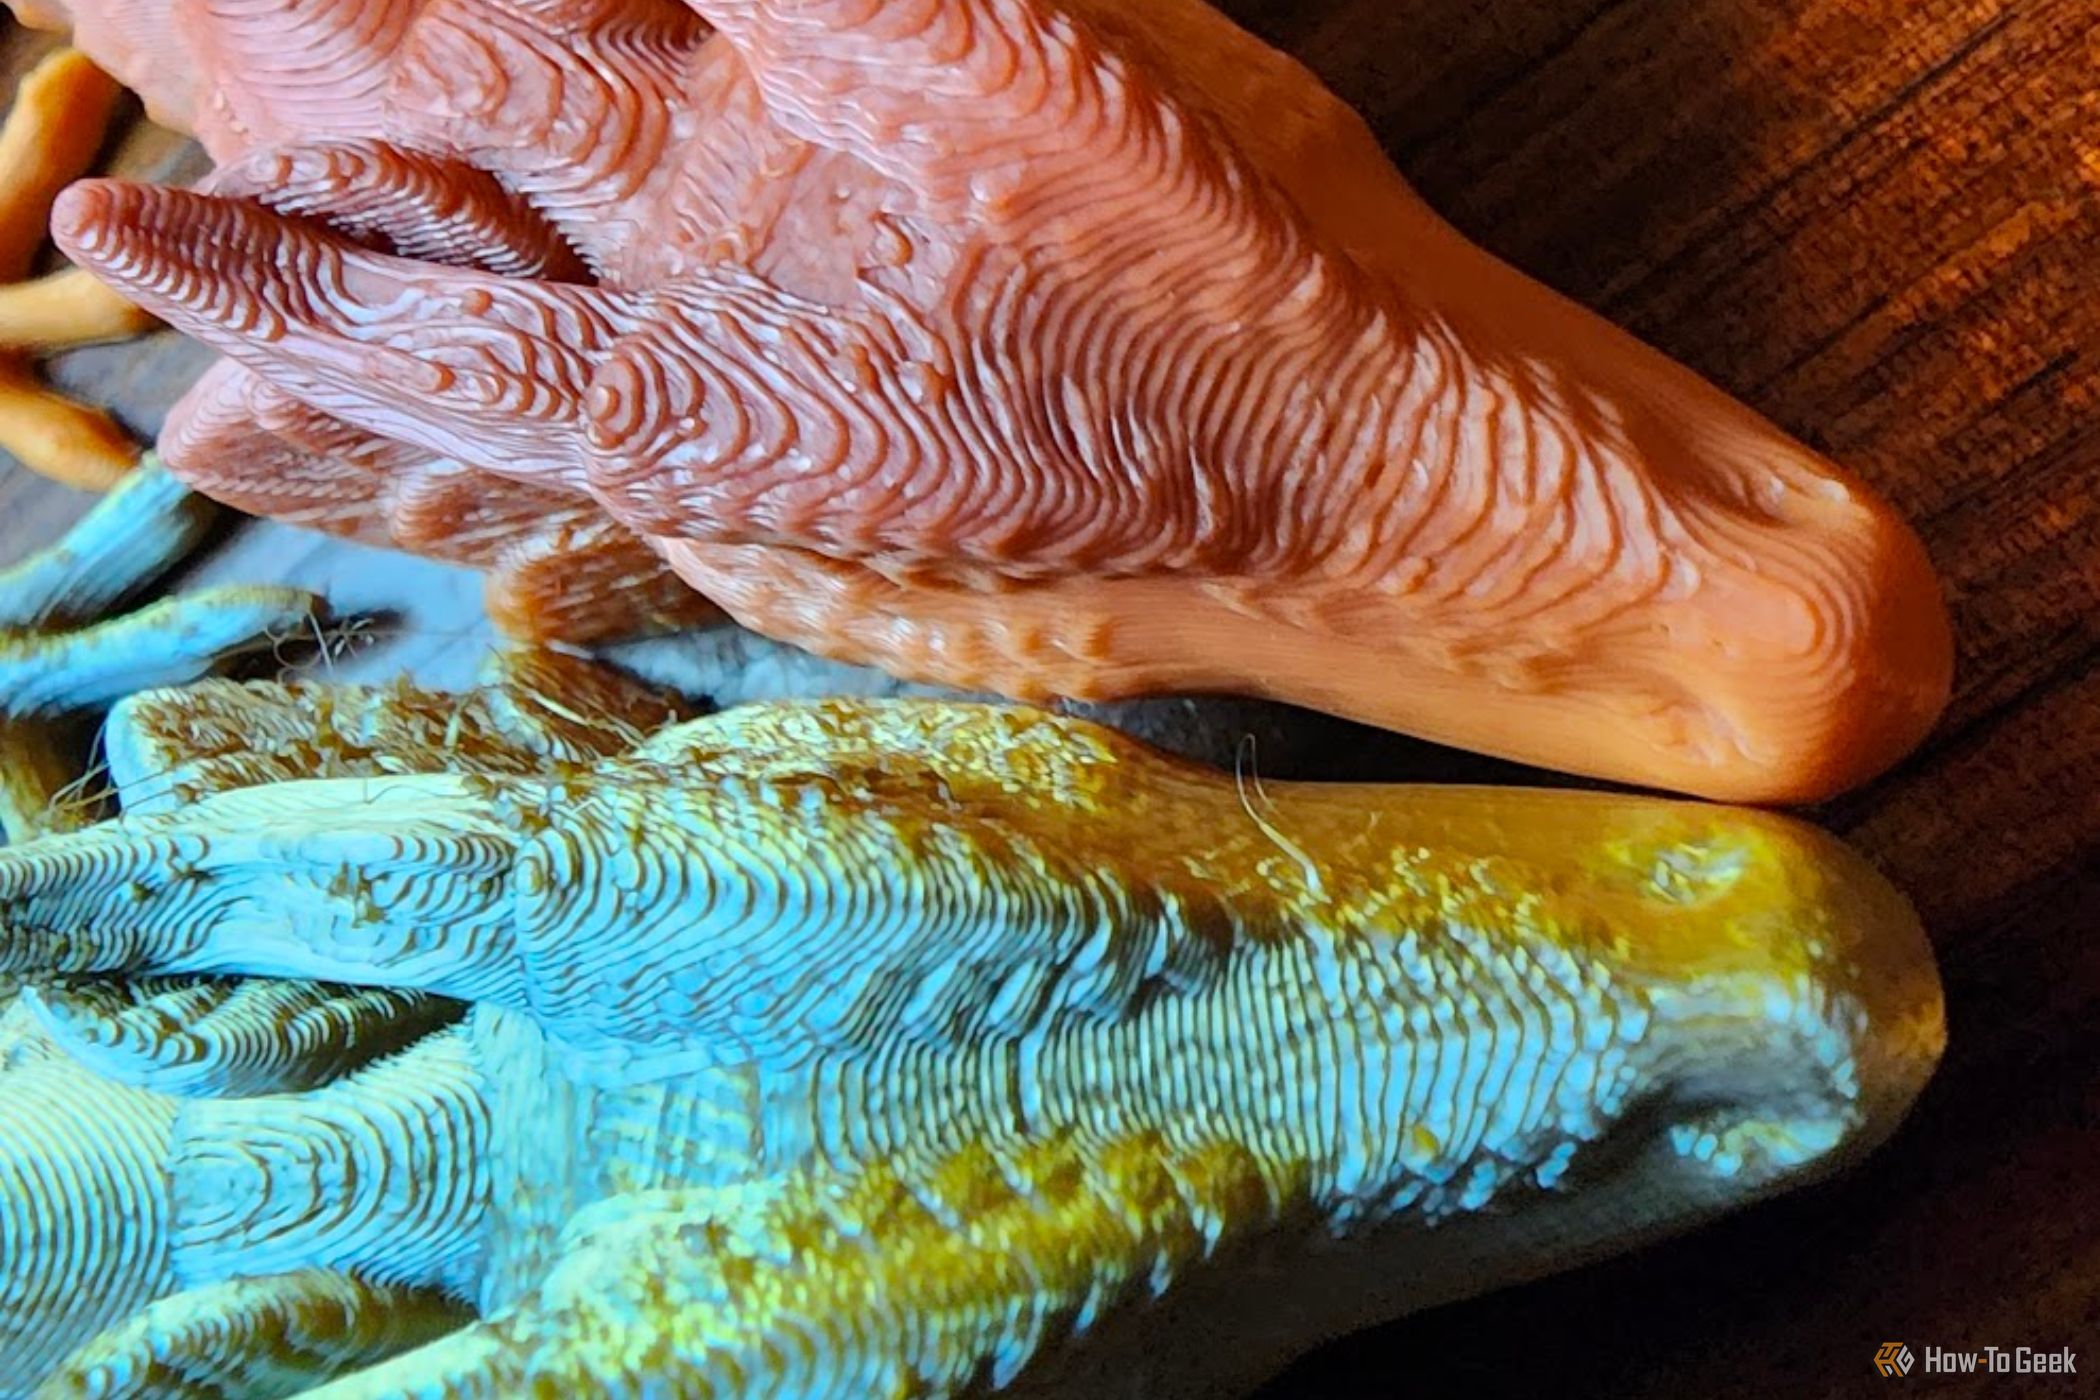
Consider this image of two models, at the same quality, the bottom printed with my Ender 5 S1, the top with my K1 Max. In this macro shot, the K1’s layer lines look a little sloppier than the Ender 5, although you’d be hard-pressed to notice with the naked eye. However, considering that the K1 did this print in literally half the time as the Ender 5, this slight disparity is a non-issue in my book.
Sydney Louw Butler / How-To Geek
Creality’s Software Is Good Enough
Considering who these printers are for and out of a desire to review the out-of-the-box experience, I stuck with the official Creality Print software and have no particular complaints about it. Prepping models and slicing them is a breeze. The software makes it easy to send code to the printer, see a live video feed, and control it remotely.
Creality print can open just about any 3D model file, including common ones such as STL, 3MF, OBJ, and raw Gcode. For example, here I grabbed Articulated Lizard v2 by McGybeer .
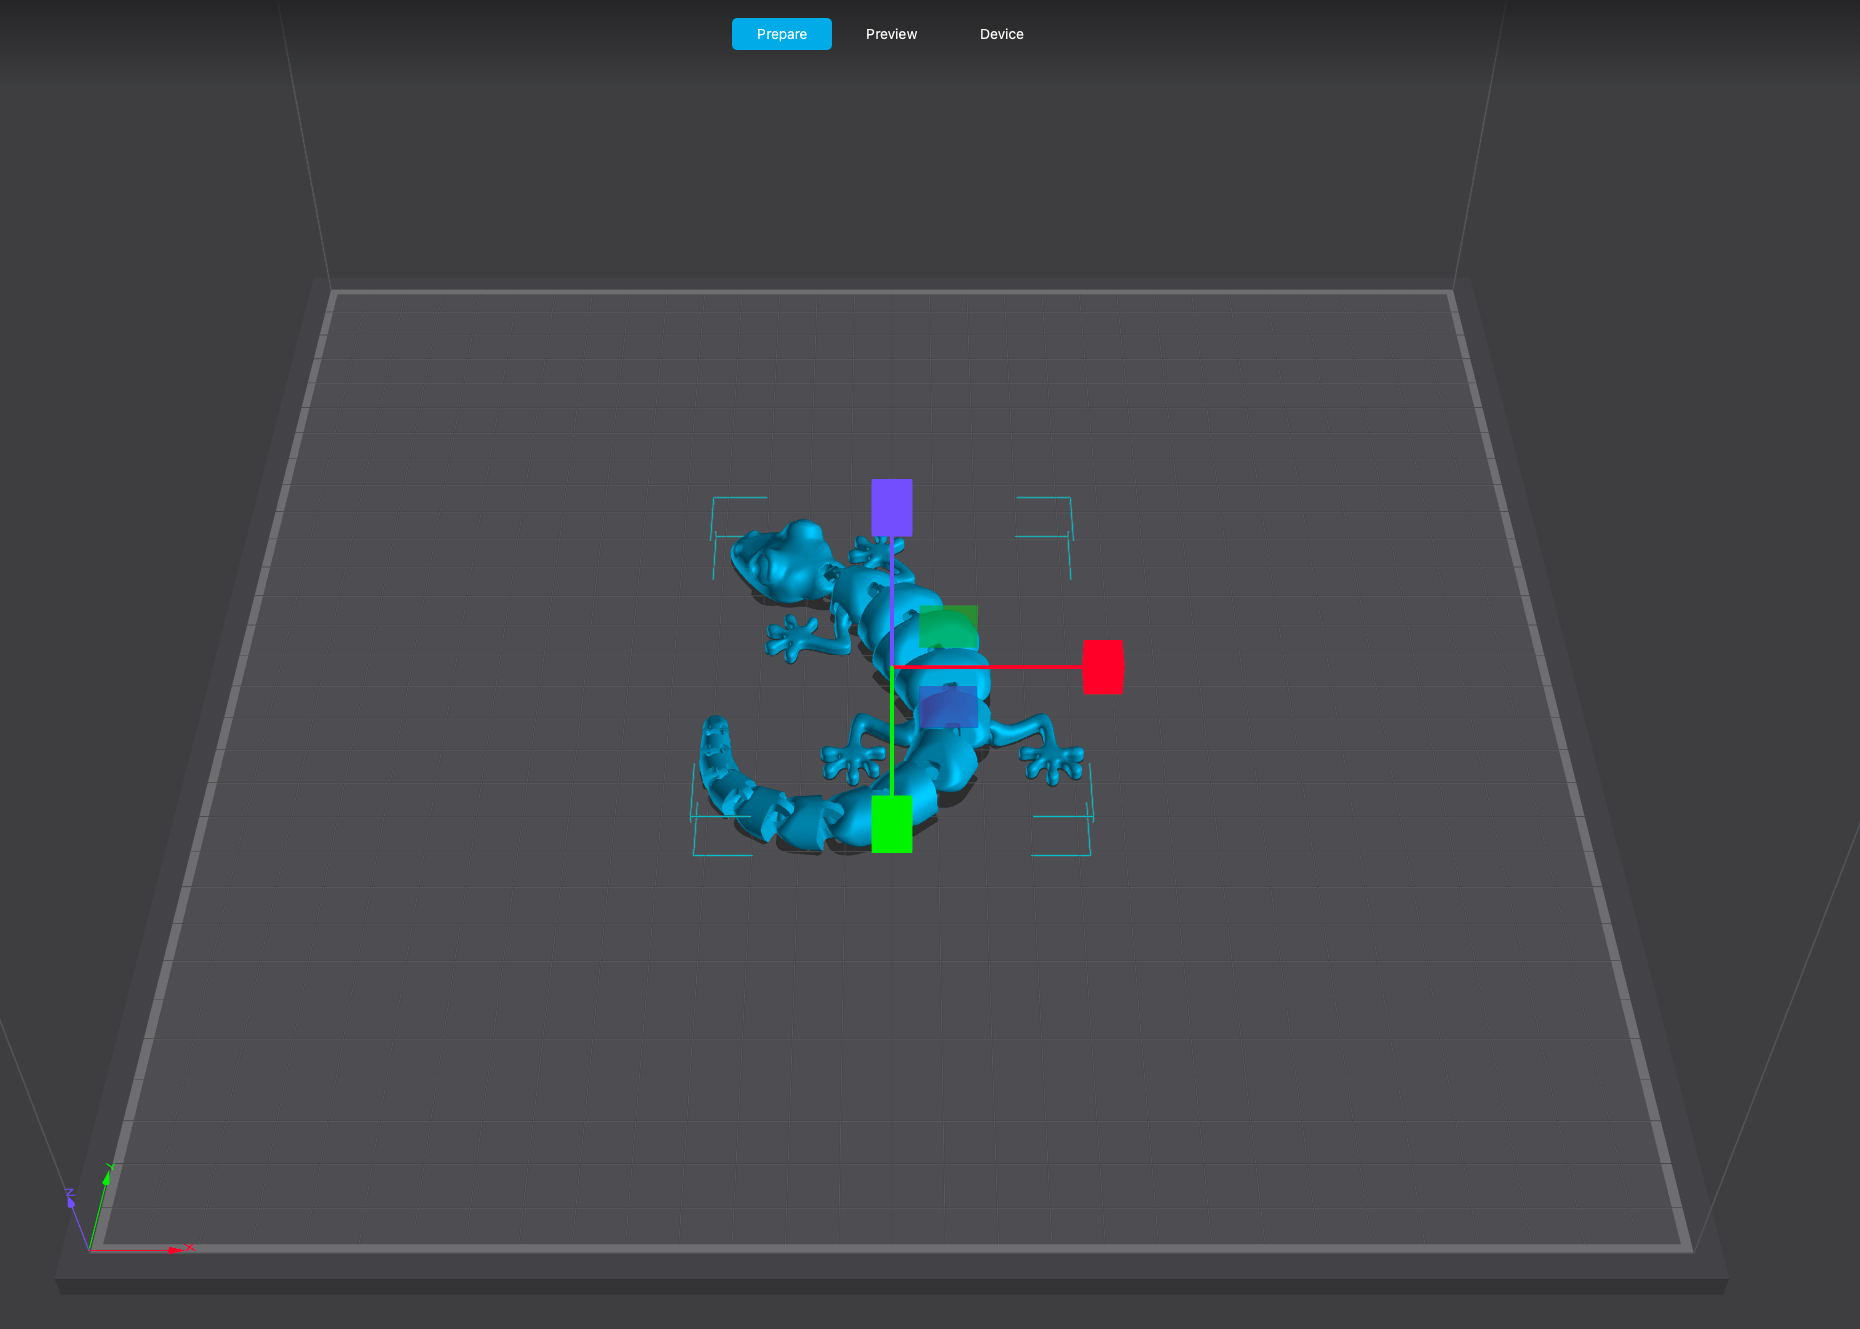
.png) Kanto Player Professional
Kanto Player ProfessionalOnce the model is loaded, you can use the tools to the left of the window to move, scale, rotate, or add support to the model.
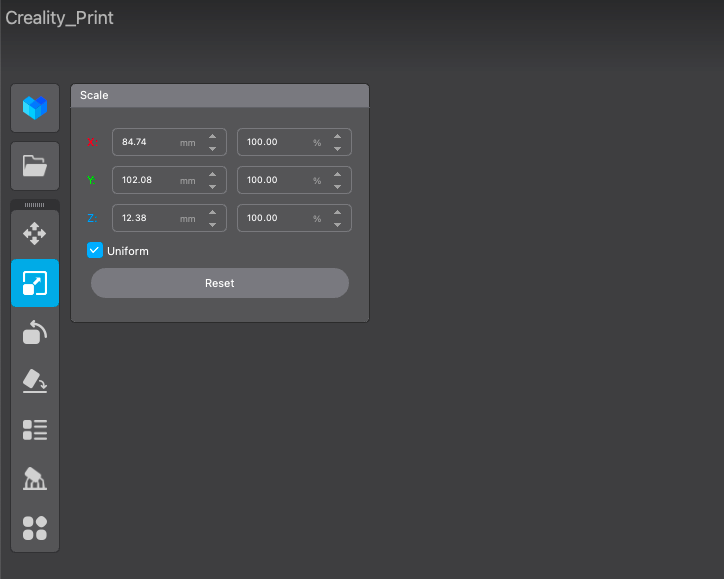
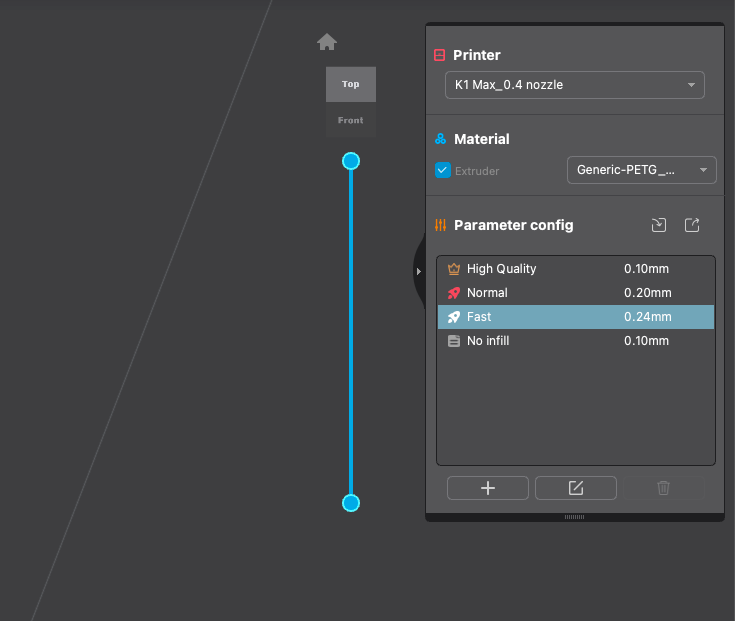
Then pick the quality preset for the print or create your own, and then hit the “slice” button.
Once the model is sliced, you can use the “LAN Printing” button to send it to the printer over the network, or “export local” to save it to a flash drive and physically carry it over to the machine.
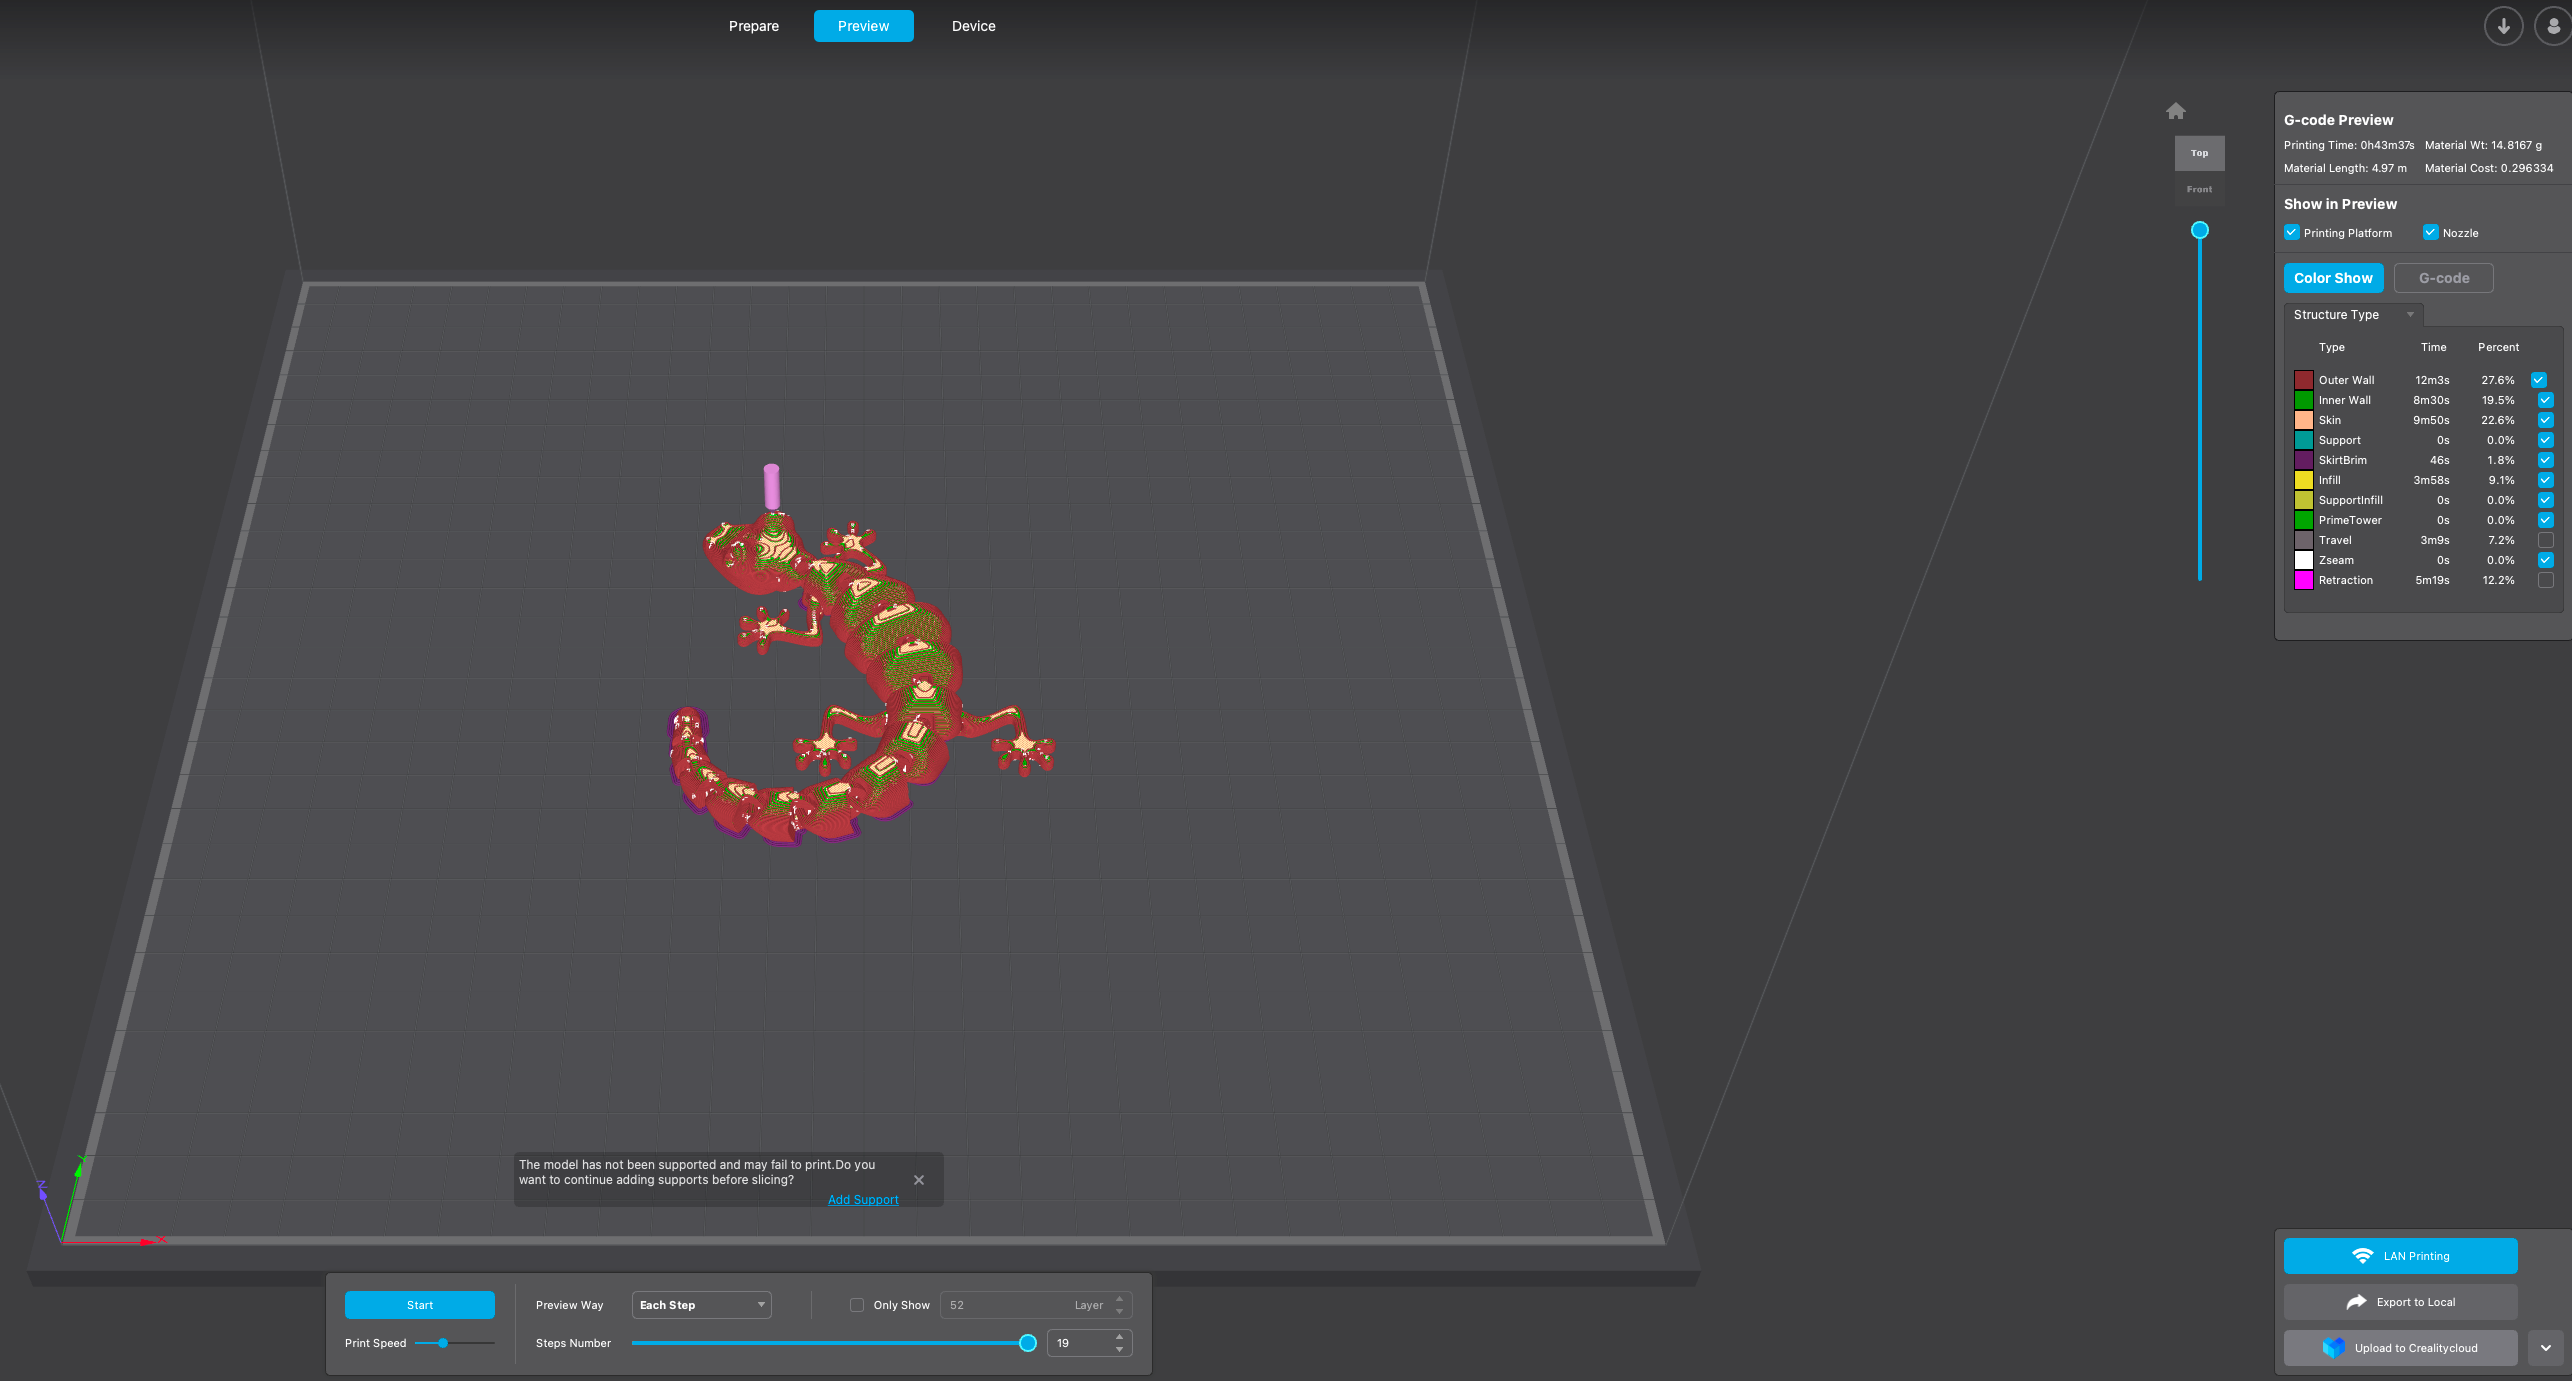

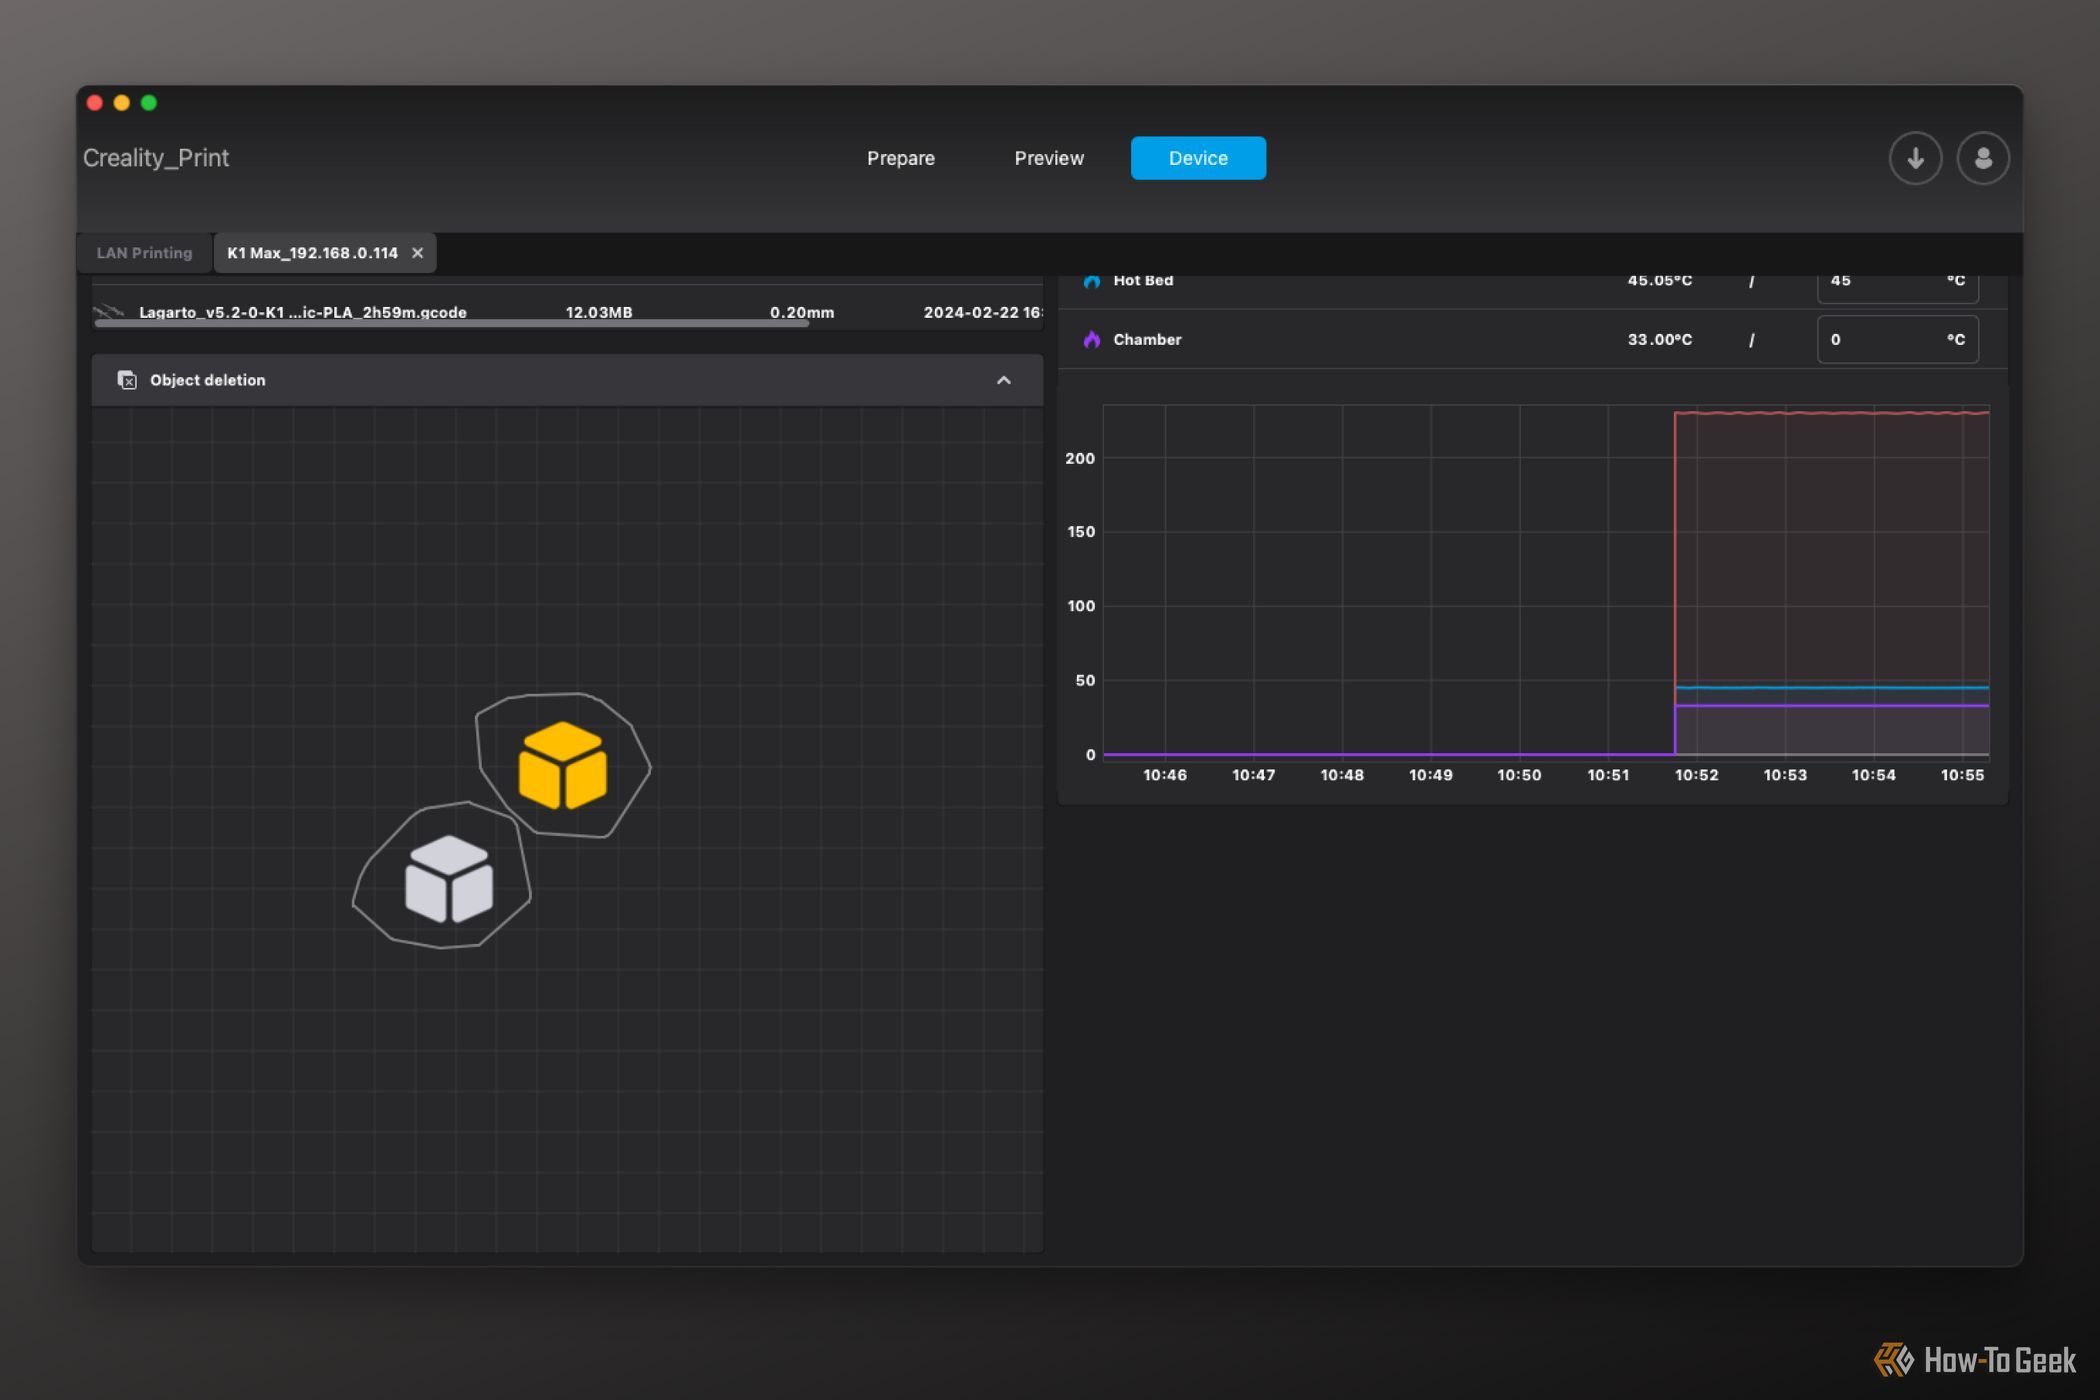
Of course, you can use any compatible slicing software you like, and you can access the print monitoring dashboard by typing the printer’s IP address into any browser connected to your LAN. Of all the remote control features on offer, my favorite was the ability to delete individual objects from the print while it’s ongoing. So, if one copy of a model goes wrong, you don’t have to lose the whole print. This saved me hours when printing plates full of models!

Key features:
• Import from any devices and cams, including GoPro and drones. All formats supported. Сurrently the only free video editor that allows users to export in a new H265/HEVC codec, something essential for those working with 4K and HD.
• Everything for hassle-free basic editing: cut, crop and merge files, add titles and favorite music
• Visual effects, advanced color correction and trendy Instagram-like filters
• All multimedia processing done from one app: video editing capabilities reinforced by a video converter, a screen capture, a video capture, a disc burner and a YouTube uploader
• Non-linear editing: edit several files with simultaneously
• Easy export to social networks: special profiles for YouTube, Facebook, Vimeo, Twitter and Instagram
• High quality export – no conversion quality loss, double export speed even of HD files due to hardware acceleration
• Stabilization tool will turn shaky or jittery footage into a more stable video automatically.
• Essential toolset for professional video editing: blending modes, Mask tool, advanced multiple-color Chroma Key
Sydney Louw Butler / How-To Geek
The onboard software is also clear and easy to use, and I never really had to consult a manual. Anyone who’s operated a touch-screen phone should be up and running in very little time. Creality Print is also intuitive, making the phases of print preparation clear. if you’ve never touched 3D printing software before, then its Prepare/Preview/Device tabbed design makes it easy. You may have to read some of the help documentation, which is reasonable, but you hardly need an engineering degree!
Technical Difficulties
Of course, there’s no such thing as a perfect product, and I did run into several issues while using the K1 Max. The most serious was an extruder blockage that required taking the hot end apart and clearing it manually. This was 100% down to an issue with the filament, which had swollen inside the hot end and could not be retracted or extruded. The good news is that it only took the removal of three screws, and having someone hold the motor while I removed the offending materials. Then I was back in business.
Another more trifling issue has to do with the angle of the filament tube leading into the hot end. It has a very sharp turning angle just before entering the extruder, which makes it hard to know if the filament has gone in and can even lead to breakages. The solution is fairly simple. Since it just takes a single button press to release the end of the tube, I fed the filament through all the way and then bent the tube back onto the hot end.
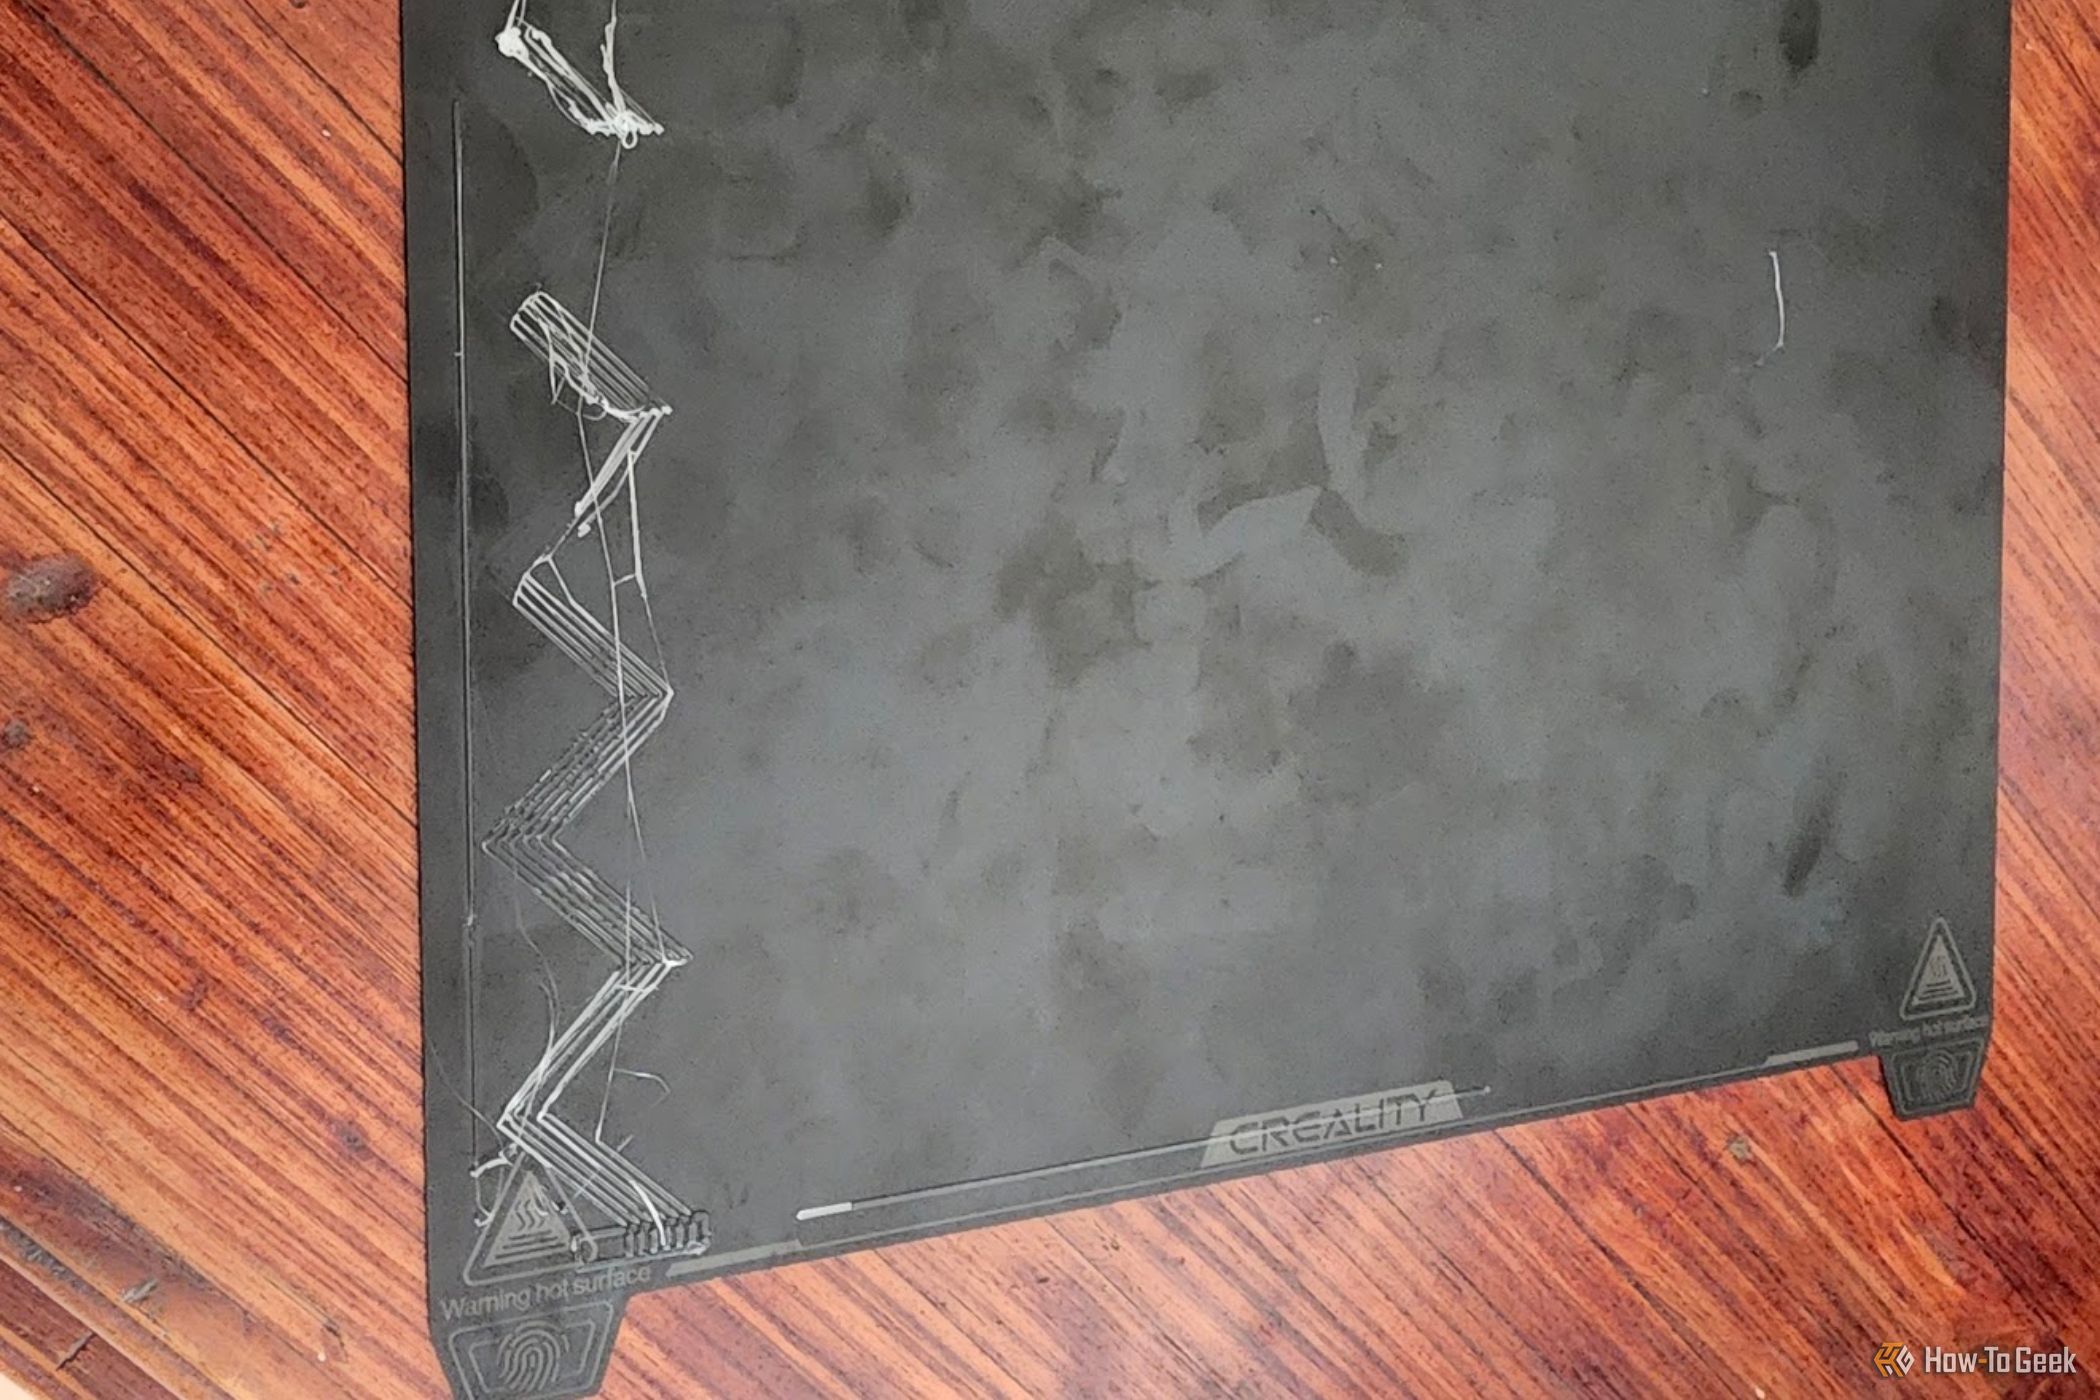
The K1 comes with a smooth print bed (magnetically attached and easily swapped with alternatives) so the company recommends using glue from the included glue stick to coat the print area. However, this is messy and in general, I don’t like it, but the good news is that I rarely needed to use the glue at all. With a standard skirt or with models with a decent contact area on the bed, glue was not necessary. When I did need to use it, it worked brilliantly but added cleanup after the print.
Pricing and Availability
The Creality K1 Max retails for $929 and is readily in stock for U.S. customers. Internationally, it seems fairly easy to get, but that won’t be true for all territories, of course. This is Creality’s latest flagship series of consumer 3D printers, so I don’t expect finding a unit to buy will be a challenge anywhere the company currently does business.
Should You Buy the Creality K1 Max?
The Creality K1 Max is the most refined, complete, and hands-off printer I have ever used. I would be completely comfortable buying one for my mom with the knowledge that I’d rarely have to help her. While the K1 Max isn’t quite on the same level of comparative refinement as a modern paper printer, this is finally a printer that’s good enough for the mainstream prime time.
The extra print bed area is genuinely practically useful, the amount of automation is effective, and having no manual knobs to dial in just to calibrate the machine will make you dread going back to previous-generation systems. In terms of features and price, it’s going head-to-head with the likes of the Bambu Labs P1S , but with a significantly higher build volume. At this price, for this build volume, with these features and technologies, I have no problem recommending the K1 Max to any individual home user or to small businesses.
Creality K1 Max
9/ 10
The Creality K1 Max is a large volume consumer 3D printer with a high-speed Core XY design, and advanced AI-based automation systems.
- Title: Creality K1 Max Evaluation: Making Waves in the Popularity of 3D Printing
- Author: Frank
- Created at : 2024-08-29 01:34:32
- Updated at : 2024-08-30 01:34:32
- Link: https://tech-revival.techidaily.com/creality-k1-max-evaluation-making-waves-in-the-popularity-of-3d-printing/
- License: This work is licensed under CC BY-NC-SA 4.0.